First Year Teachers, Organization, Teacher TIps

8 Back to School Tips

Graphic featuring '8 back to school tips' with a colorful design; includes a checklist with labeled sections for school supplies like folders and a 'take home binder' illustration.

Going back to school can be a fun and exciting thing, but also a very hard thing. Let’s be honest, we all enjoy some time off.  Now, I don’t necessarily have a solution for you if you’re dreading going back to school, but I have compiled some tips to help make back-to-school time smooth, easy, and fun for your students. 

1. Prep for back-to-school night early

If you’re a procrastinator (like me 😬), this may be a difficult task for you, but I promise you will be so relieved if you can get your back-to-school prep done early.  If I have enough energy and pep, I usually do this at the end of the school year; that way I’m already ahead when I go back to school.  It makes the summer a lot more enjoyable knowing that I already have one thing knocked off my to-do list. 

    I keep all my prepped materials in my handy dandy prepping bin, ready for me to pull back out in the fall. 

    A colorful organizational folder with labeled tabs for each month, containing bright red copies and the title 'teacher copies' along with a pencil and notebook graphic.

    2. Use Avery Labels

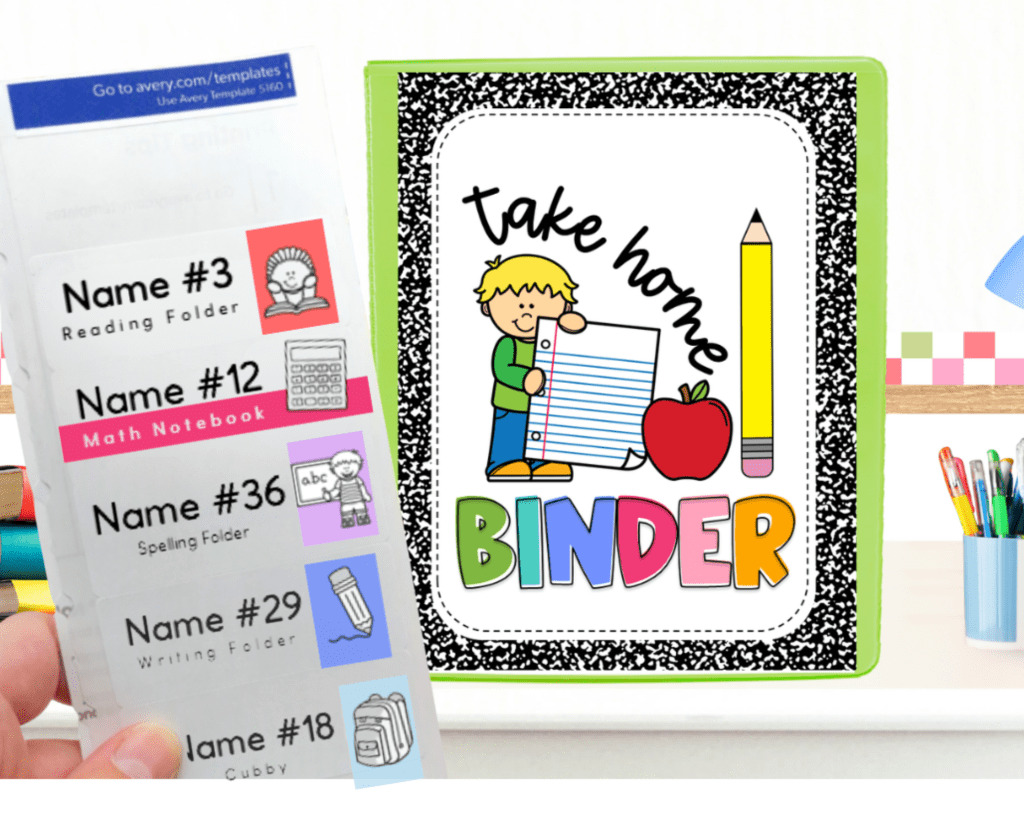
    Avery labels are my best friend at the beginning of the school year.  They make labeling and adding students’ names to things SOO easy.  I use them for student lunch numbers, student name tags, labeling notebooks & folders, labeling my materials “property of…,” and classroom library book genres.  Honestly, the possibilities are endless. 

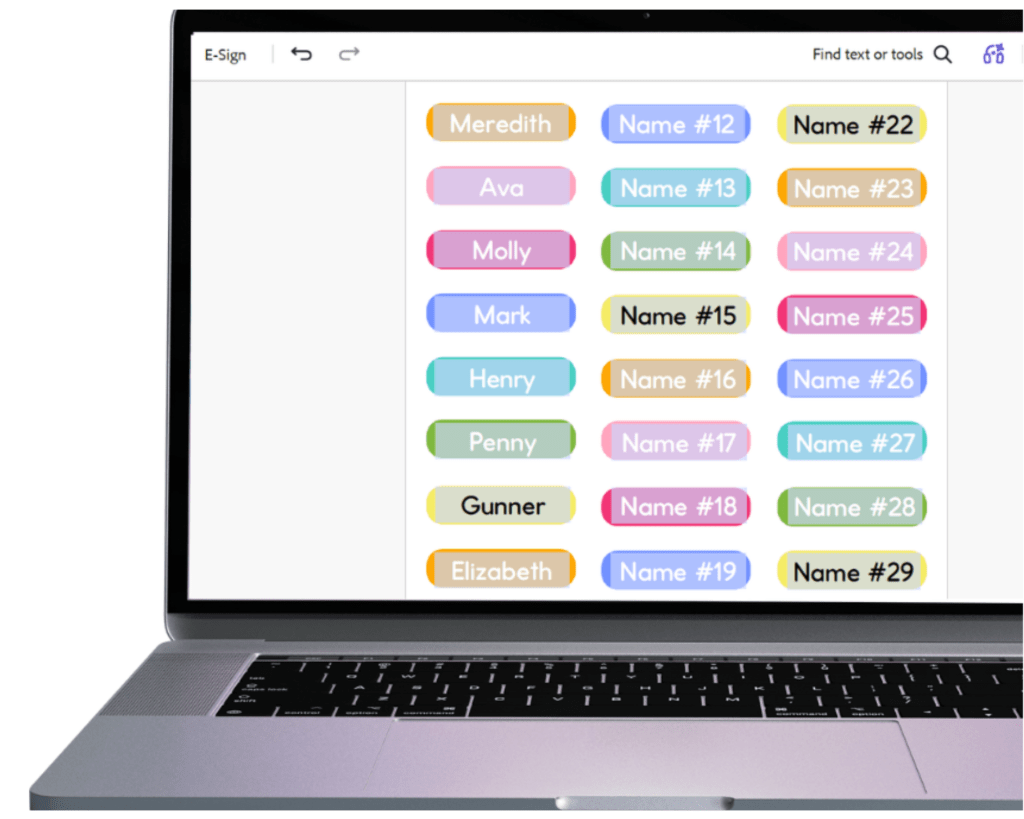
      I’m not sure how it works at your school, but we usually get our class list a week or so before school starts, and then the race is on to get everything labeled and ready quickly so I might have a chance to relax for at least a day or two before school officially starts.  These student name labels make everything SO easy.  I type my class list once, and they autofill to every page!  These labels fit on Avery labels #8160, which makes applying them really easy.  I just peel and stick them to student materials.

      Grab these student name labels to make back-to-school labeling a breeze!

      A colorful binder labeled 'Take home BINDER' featuring a cartoon boy holding a sheet of paper, an apple, and a pencil. In the foreground, a hand is holding a label sheet with various labeled folders including 'Reading Folder' and 'Math Notebook.'
      A laptop screen displaying a list of names and placeholders labeled 'Name #' in various colors, organized in rows.

      3. Keep Extra Materials & Blank Labels

      I highly recommend keeping extra materials on hand with ready-to-go blank labels.  This makes it super easy to grab materials for new students you might get throughout the school year.  I stick the blank labels right on the materials and store them in my closet just in case.  Then I simply write the new student’s name on the label, and they are all set to go.

      A collection of colorful name tags for school with labels such as 'Homework Folder' and designs featuring apples and school icons, surrounded by stationery items like markers, a pencil case, and decorative papers.

      4. Build Your Student Checklist

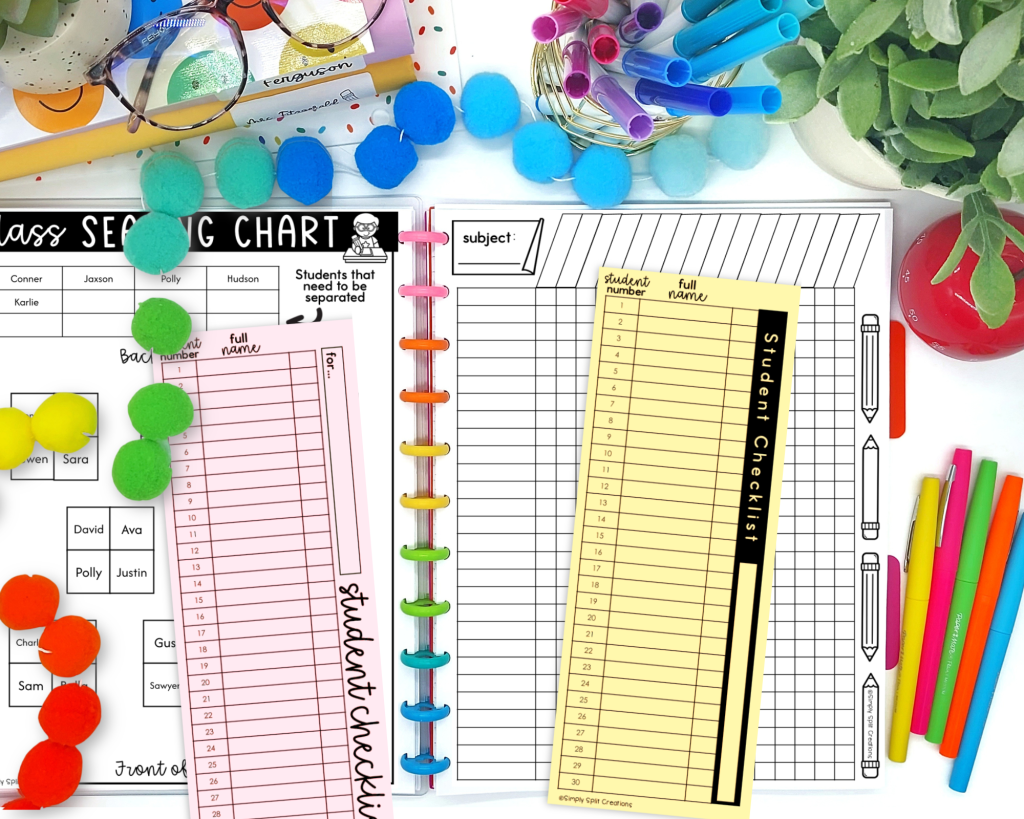
      I use student checklists daily, it seems. They are great for grading, building seating charts, field trips, and so much more. I highly recommend creating a student checklist template and keeping a bunch of printed copies on hand.  It can save you so much time and be so helpful throughout the school year.

        If you’d like a template, check out my teacher essentials pack that includes student checklists, teacher to-do lists and SOO much more!

        An organizational workspace featuring a class seating chart, a student checklist, colorful pom poms, pens, and a small plant.

        5. Generic Bulletin Board Subject Titles

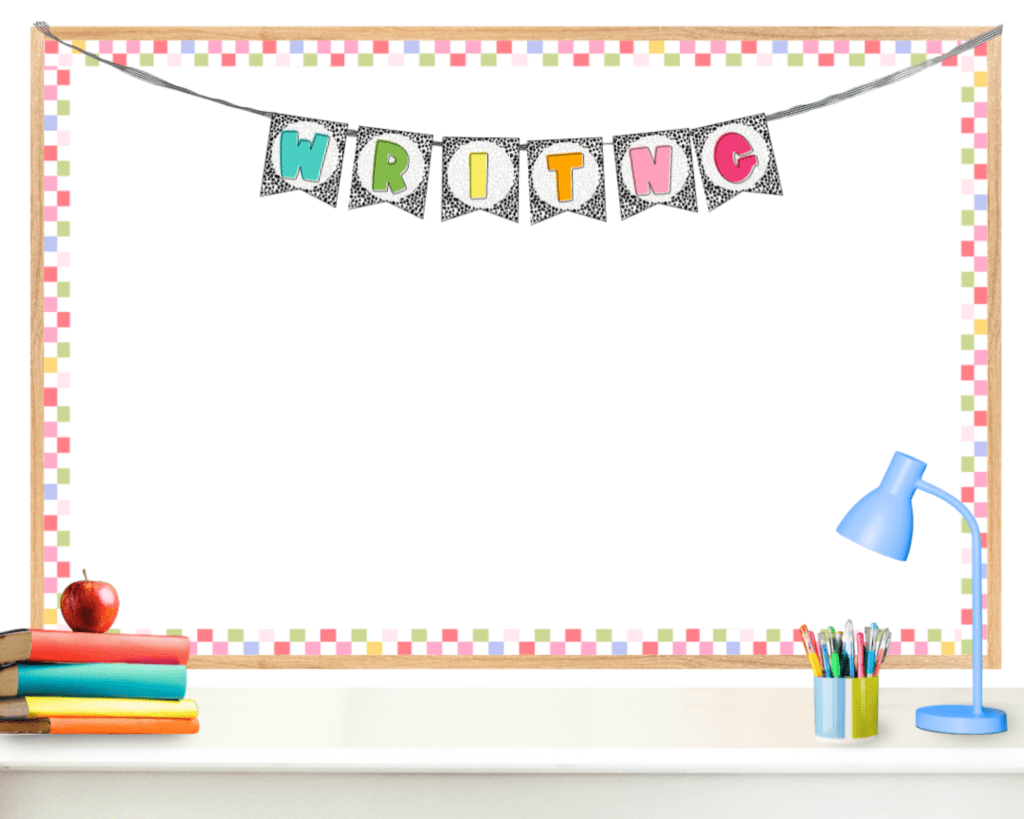
        I am a big advocate for utilizing bulletin board space for learning rather than cutsy things.  Plus, bulletin boards can be hard to change out seasonally because, honestly, who has time for that?  If you want simple bulletin boards to use for learning, I recommend titling your bulletin boards with different subjects and using them to display things you are learning, like anchor charts, work examples, etc. 

          My favorite way to title bulletin boards is to use banners, rather than individual letters.  Banners are easy to prep, easy to hang, and easy to reuse year after year.  I keep my premade bulletin board banners strung, folded up in baggies, so they are super easy to store as well.

          If you want to shop around for a banner style that matches your classroom theme, check out the bulletin board banner options in my shop.  Each banner set includes the following phrases in several patterns and colors: 

          • “Welcome Back!”
          • “Math”
          • “Reading”
          • “Writing”
          • “Grammar”
          • “Science”
          • “Social Studies”
          A bright classroom scene featuring a bulletin board with the word 'WRITING' on decorative banners, surrounded by a colorful border. A desk displays a stack of books, an apple, and a cup of assorted pens beside a blue desk lamp.

          6. Write Students’ Names on their Desks in Sharpie

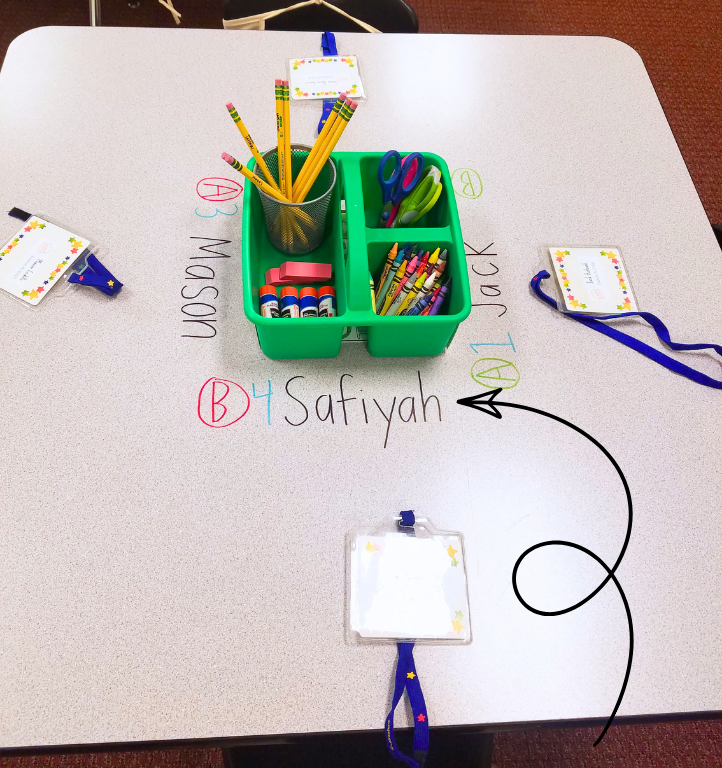
          Seating charts are a must, in my opinion, to keep the chaos away.  If you are like me and hate name plates that students pick at and ruin, then you may want to try this method.  You can directly write students’ names on their desk or table spot with a Sharpie.  This may seem a little scary at first, but trust me, it won’t last forever and won’t remain permanent.  The names typically fade and go away within a month or two just from student use.  

            If you need students’ names gone from their desks sooner than that, hand sanitizer does the trick.

            A classroom table with writing supplies including pencils, markers, and scissors in a green container, with names labeled around the edges.

            7. Create Desk Partners

            You may have been wondering what the colored letters and numbers are for that are written next to the student’s name in the picture above.  Those are to form partners or groups really easily.  You can easily assign tasks to a specific partner or group member this way.  You can mix up partners too by saying, colored partners (reds go together, greens go together), letter partners (A’s go together, B’s go together), ect..  Other examples might be…

              • “Group member #1, get glue sticks for everyone”
              • “Number 2s may line up”
              • “Partner B will start first in the partner game”
              • “Group member #3, gather papers and turn them in to the tray”
              A green container filled with various school supplies including pencils, scissors, and glue sticks, on a table marked with names and letters associated with students.

              8. Let Students Get to Know You

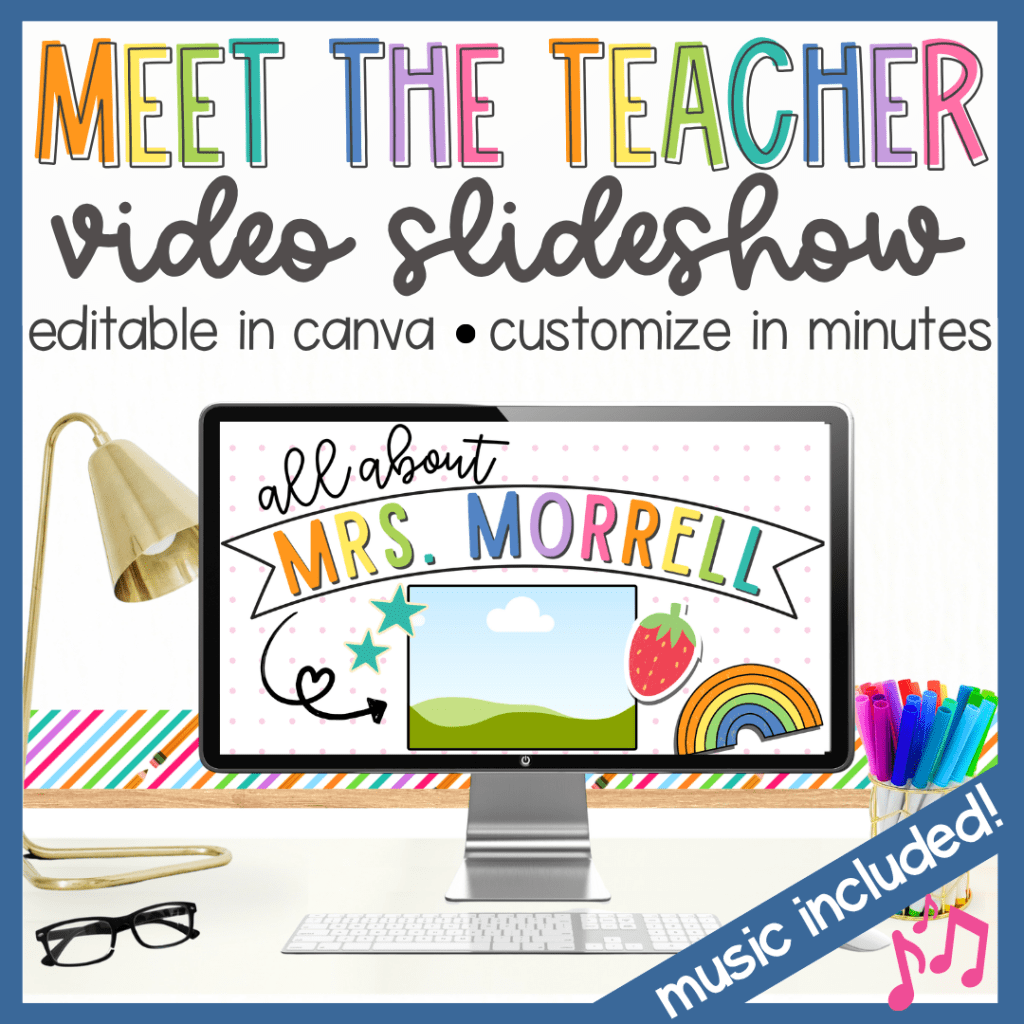
              One of the best ways to build classroom community and help with classroom management is to build strong relationships with your students.  Letting students get to know the real you helps make connections with students and is a great way to start building strong relationships.  There are a lot of small things I do throughout the year to make this happen, but one simple thing I do at the beginning of the year is share a short video all about me.  

                Students love learning about your hobbies and family this way.  Check out my  “all about the teacher” video template to make it quick and easy to make and fun for your students to get to know you.

                A digital advertisement for a customizable 'Meet the Teacher' video slideshow featuring a desktop computer displaying colorful graphics about Mrs. Morrell. Includes text indicating it's editable in Canva and mentions music is included.

                Organization, Teacher TIps

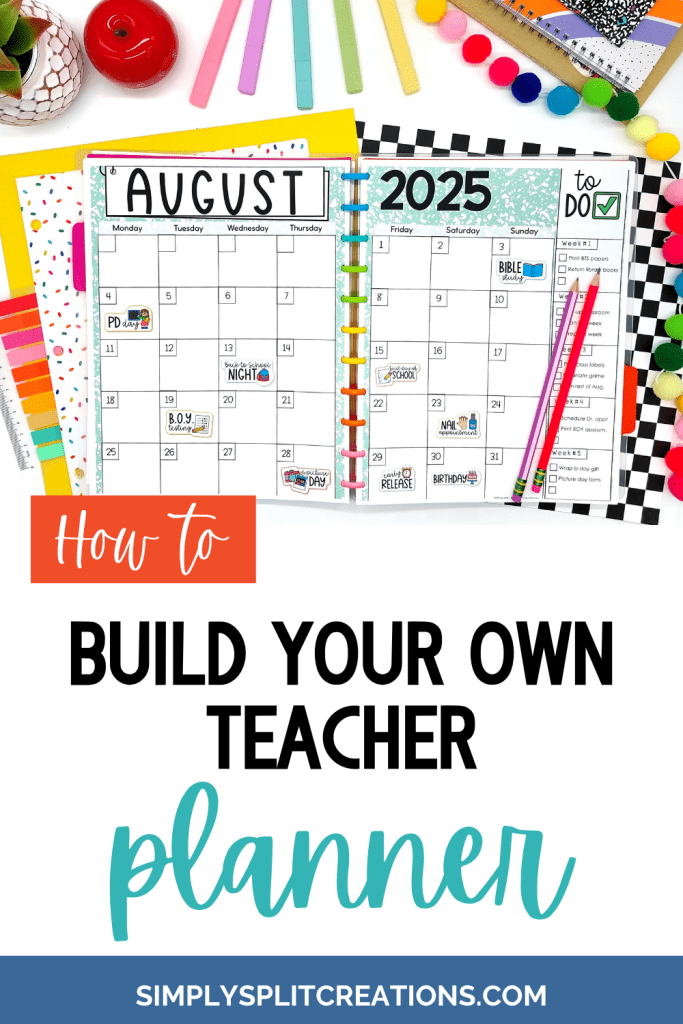
                How to Build Your Own Teacher Planner

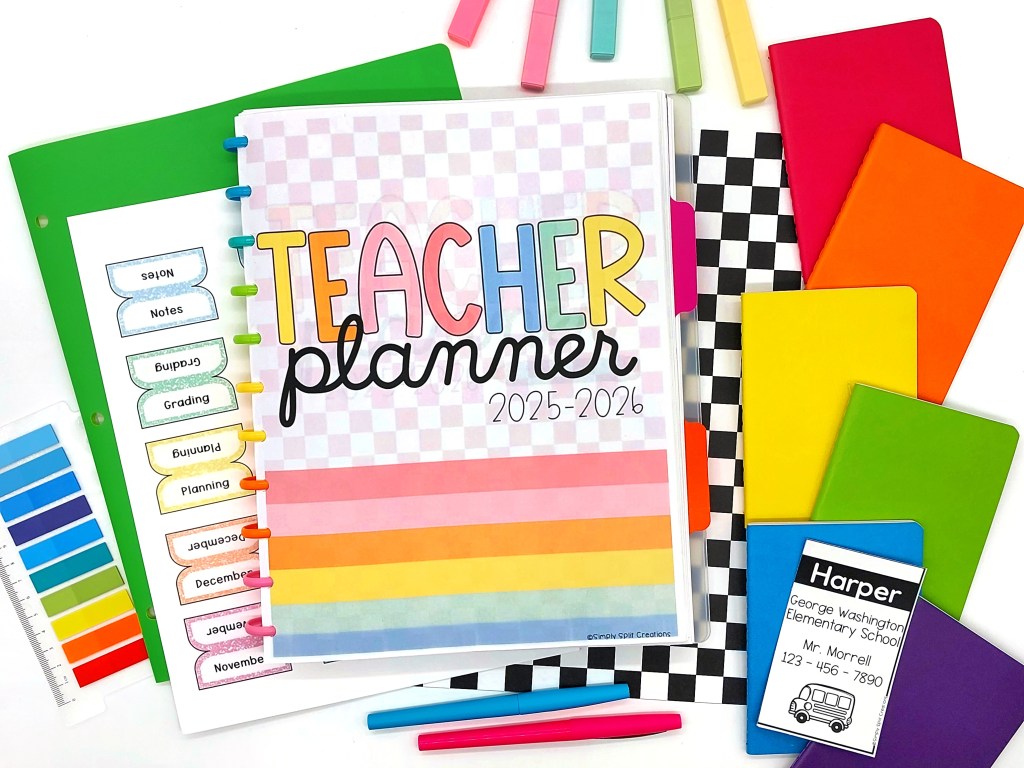
                A colorful planner open to August 2025, displaying a monthly calendar layout with event stickers, beside decorative items like pens and a plant. The title reads 'How to Build Your Own Teacher Planner'.

                Lesson planning can be such a chore, which is why it’s important to find a system that actually works for you.  Most teacher planners include pages I don’t need & lack the pages I do need, which is why my life changed when I finally found a way to build my own teacher planner with exactly the items I need.  This makes my lesson planner a lot smaller to lug around, more personalized, and easier to use.

                Find a Printable Digital Planner

                First, you need to find a printable digital planner that works for you.  There are lots of great options on TPT.  I recommend finding one that has all the components you’re looking for.  I created a big teacher planner that includes lots of great options.  You can purchase the full bundle or just grab the areas you want.  It includes…

                • LESSON PLANNER & SCHOOL YEAR CALENDAR (curriculum mapping, monthly checklists/goals etc, month at a glance, year at a glance, batch lesson planning, class schedule, important dates, specials class schedule, digital stickers, & more)
                • PLANNER COVERS, SECTIONS, & TABS ( 60+ customizable cover options, premade & editable section pages & tabs)
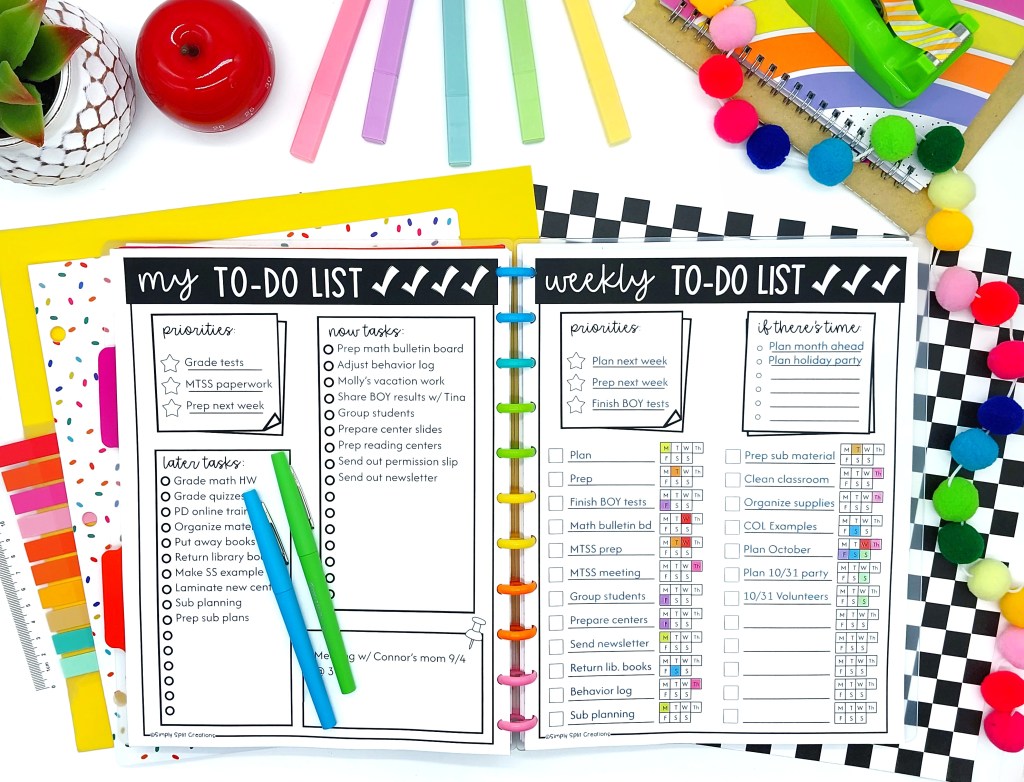
                • TEACHER ESSENTIALS (to-do lists, student checklists, class list, grading, party planning templates, class birthdays, volunteer sign-up sheets, parent communication forms, goal planning, PD tracking, notes, student seating chart template, passwords, & more) 
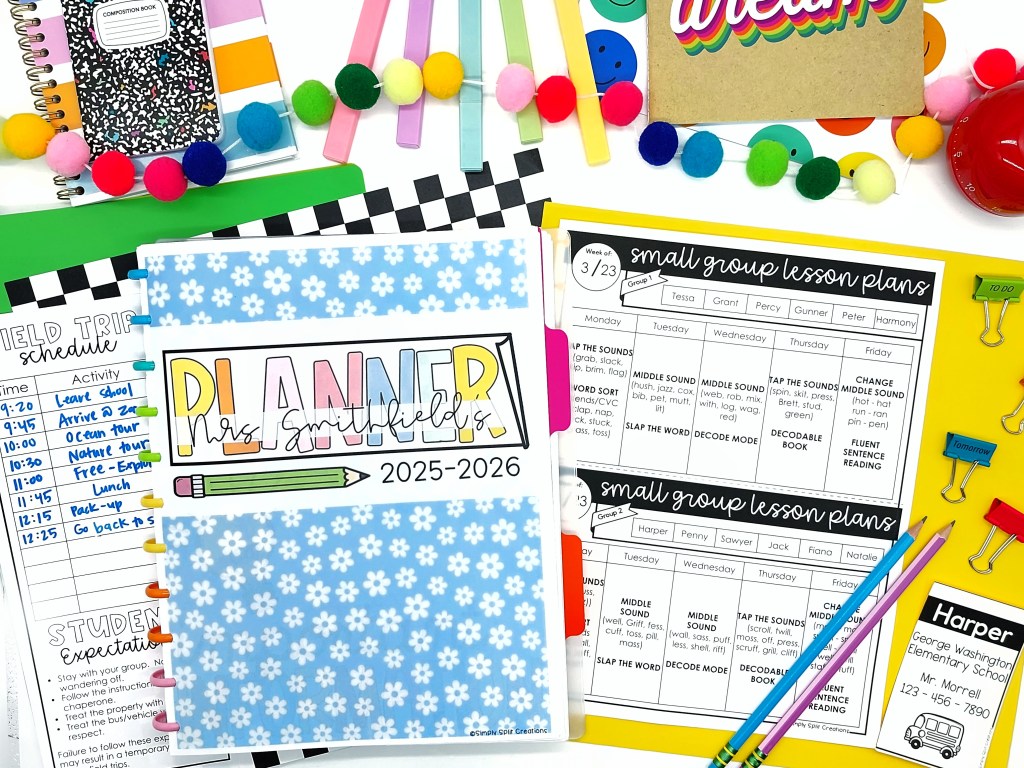
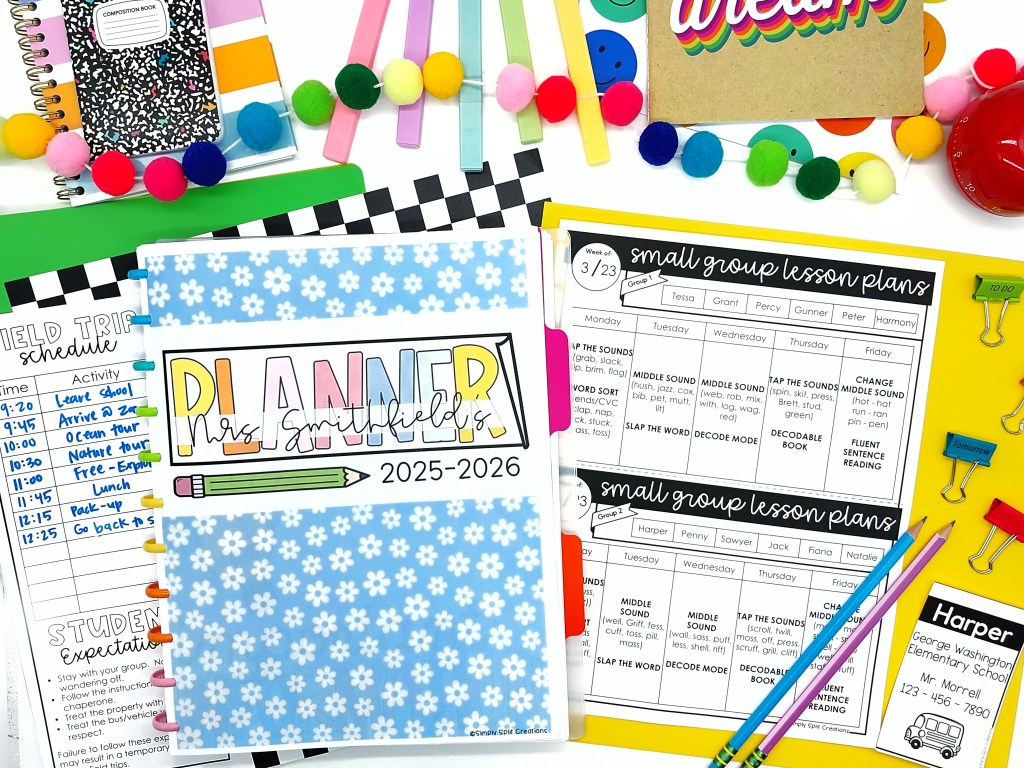
                • SMALL GROUP PLANNER (reading & math group formation, small group lessons, small group notes, etc.)
                • FIELD TRIP PLANNER (brainstorming ideas, field trip planning notes, transportation planning, field trip schedule, chaperone guide, emergency sheet, student list, student name tags, etc.)
                • SUBSTITUTE PLANNER (class schedule, specials class schedule, classroom management plan, sub plans, emergency protocols, emergency phone numbers, etc.)
                • PERSONAL PLANNER (weekly family schedule, grocery list, meal planning, gift planner, b-day list, book/movie/TV show recommendations, healthy habits tracker, nutrition & wellness, etc.)

                Below are some of my favorite pages from the planner:

                How to Build Your Planner

                You’ll need to decide what materials you want to use for your planner.  Below are some options (listed in my favorite order). 

                1. Disc Ring Binder:  This is my FAVORITE option!  You’ll need to purchase a few items to make this work, but it’s super durable, easy to add or get rid of pages, as condensed as you make it, plus it turns out really cute!  I’ll go into detail below about what items I use to build my disc ring teacher planner.  You can even re-use the materials year after year.
                2. Binder:  This option works well too and is easy to add or remove pages.  The downside is that it is super bulky.
                3. Spiral Bound:  This can be expensive and is a more permanent option.  It doesn’t make sense to figure out how to add pages, but you can remove pages if needed; it just might take some time to remove several pages.  This is very slim and easy to carry around, though, plus it looks really cute and professional.
                4. Folder:  A folder only really works for an extremely small planner.  If you just need a few items, this can work out really easily with a binder hole punch.  The downside is that it can be difficult to keep a particular page open.

                Disc Ring Binder Supplies

                1. Digital/Printable Planner:  HERE’S A LINK to the digital/printable planner I made.
                2. 11 Disc Binder Hole Punch:  HERE’S A LINK to the hole punch I use. HERE’S A LINK to a more affordable option.
                3. Discs:  You’ll want to decide how many pages you think you will be printing so you know the size of disc rings you will need.  Below are the links to my favorite options for various sizes.
                  1. 1in = 80-100 pgs (160-200 pgs if double-sided)
                  2. 1.5in = 175-250 pgs (350-500 pgs if double-sided)
                  3. 1.75in = 250-280 pgs (500-560 pgs if double-sided)
                  4. 2in = 280-330 pgs (560-630 pgs if double-sided)

                *Keep in mind that if you use cardstock paper or a heavyweight paper, you may not be able to fit as much paper in your planner.

                Extra Supplies that are Helpful

                • Disc Transparent Covers:  You can simply laminate your cover page, but if you want your planner to be more durable, I would recommend using a 10 mil laminating pouch, OR, getting the transparent disc covers.  HERE’S A LINK to the ones I use.  
                • Disc Paper Pockets:  If you like storing other papers in your planner, it can be really nice to have a pocket in your planner.  HERE’S A LINK to the pockets I use in my teacher planner.
                • Month Sticker Tabs:  If your planner doesn’t come with printable tabs, or you just don’t want to print and cut your own tabs, I would recommend using these month sticker tabs.  HERE’S A LINK to the month sticker tabs I have used.
                • Pen Holder Adhesive:  I love keeping a pen or pencil with my planner, so this pen holder adhesive is a must in my opinion.  You can grab a pack and use them year after year, or you can reuse the same transparent cover & pen holder on your planner each year.  HERE’S A LINK to the pen holders I use.

                Printing Tips

                • Print the calendar on cardstock:  I like having a heavier feel to my calendar pages.  I use cardstock for the calendar pages as well as my cover page.
                  • If you want to add pages in between the cardstock calendar pages, DO NOT PRINT THEM FRONT & BACK.  Instead, you can add pages in between the calendar months manually after printing.  You can tape the calendar pages together to the next page so that the pages flow more nicely if the blank pages bother you.
                • Duplicate one document to build your printing file:  You’ll want to duplicate or make a copy of the planner, then copy & paste the pages in the order that you want them to appear in your planner.  This helps you be able to print front & back.  If there are pages that specifically need to print on the left page or right page, you’ll want to pay attention to that when printing so that they line up nicely.  You can add a blank page if needed to fill in as a placeholder.  You can assign ODD numbers to appear on the LEFT SIDE and EVEN numbers to appear on the RIGHT SIDE or vice versa.
                • Test Print:  I recommend test printing a couple of pages to make sure they are lining up the way you want them to in your planner. 
                • Think before you punch holes:  It can be super easy to punch holes on the wrong side of your pages.  I recommend lining the pages up and test “opening” the pages before actually hole punching them.  This way, you can make sure you are happy with how the pages will lay in your planner.

                Below are a few pictures of the final product.


                Teacher TIps

                The Ultimate Lesson Planning Batching Method to Save You Time

                An organized workspace featuring a lesson planning notebook, colored pens, and pastel notepads on a pink background. The image promotes an effective lesson planning method.

                Planning… Love it or hate it, it’s a huge part of teaching.  

                If you haven’t been able to find a good planning routine, or if you’re struggling to make sure things are planned week to week (or even day to day), I’ve got a suggestion for you that completely changed the way I lesson plan, and helped me get time back.

                Early in my teaching career, I STRUGGLED with planning and prepping.  During my first year of teaching, those first couple of weeks of school were LONG and HARD.  I was planning day by day and staying in my classroom until after dark to finish planning/prepping what I needed for the next day.  That is an absolutely exhausting way to live.  Slowly, I got faster and better at planning.  

                When I started implementing “batch” lesson planning strategies a few years ago, I remember feeling like I had happened upon magic fairy dust.  Planning all of a sudden became SOO much easier, and I finally had a good rhythm and no longer felt like I was drowning.  

                If batch lesson planning is new to you, don’t worry, I’ll go over the basics with you so you too can gain your time back and lesson plan in a breeze.

                What is batching?

                If batching is brand new to you, you may be wondering what batching is.  Batching is basically doing “like tasks” in bulk.  Batching saves time because there are few transitions and your mind can focus on one simple thing, which often makes things flow more easily.

                How does batching apply to lesson planning?

                When it comes to lesson planning, I like to batch lesson plan by subject.  Batching by subject is helpful because you can stick with one subject and plan out a month’s worth of lessons in a pretty quick amount of time.  This is because you’re not switching between different concepts, and you’re solely focused on one subject.  Planning this way also has helped me think more long-term and be more strategic or “thought-out” when lesson planning.

                Lesson plan batching in action?

                So you might be wondering how this actually works, so I’ll give you an example.

                When you start out, you will have to do a bit more planning upfront, but it will go quicker after the first week.

                During the first week, I plan the following items:

                • Teaching procedures
                • Get to know you activities
                • Grammar – throughout the next 4 weeks
                • Math – throughout the next 4 weeks
                • Phonics
                • Writing

                During the second week, I plan the following items

                • Grammar – (already planned)
                • Math (already planned)
                • Phonics – throughout the next 4 weeks
                • Writing 
                • Social studies/science 

                During the third week, I plan the following items

                • Grammar (already planned)
                • Math (already planned)
                • Phonics (already planned)
                • Writing – throughout the next 4 weeks
                • Social studies/science  

                During the fourth week, I plan the following items

                • Grammar (already planned)
                • Math (already planned)
                • Phonics (already planned)
                • Writing (already planned)
                • Social studies/science – throughout the next 4 weeks

                Once you get to this point, you only have to prep 1 (maybe 2) subjects a week.  This significantly reduces the amount of time I spend lesson planning, which leaves me time to grade, prep, or any of the other million things on my to-do list.

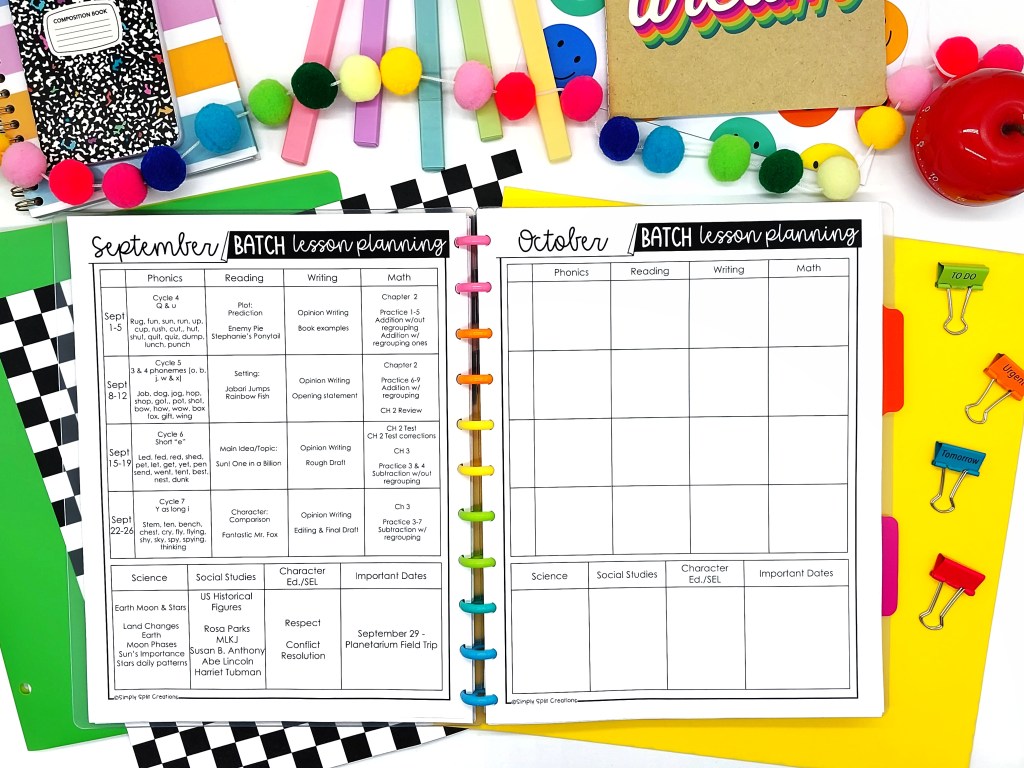
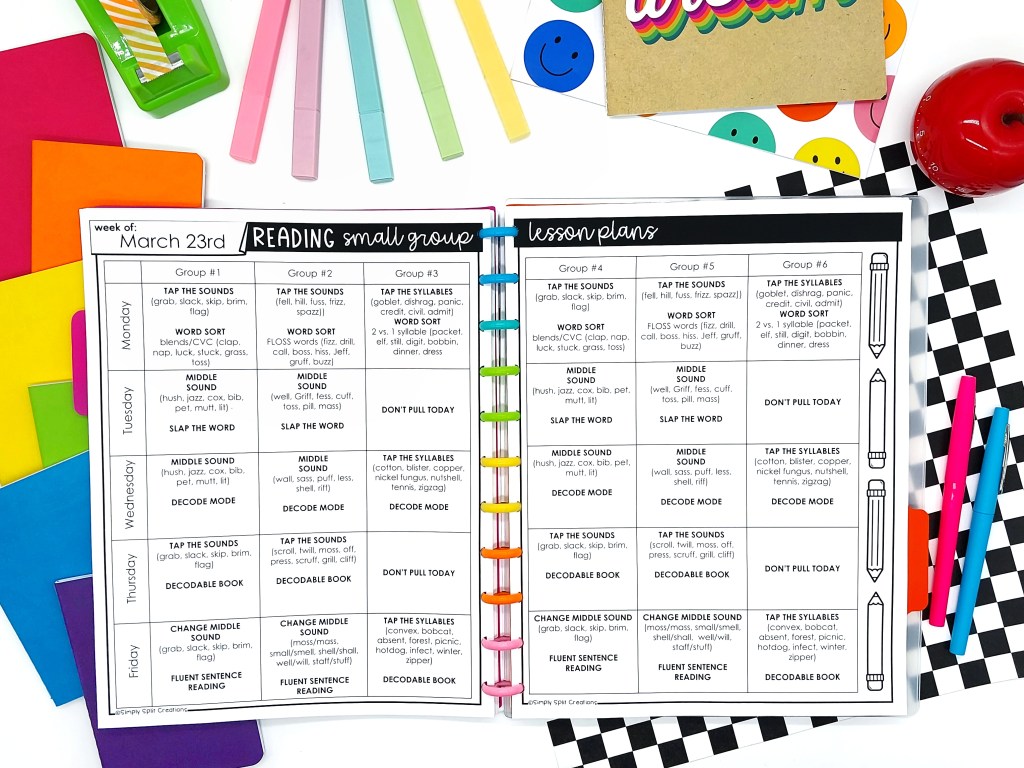
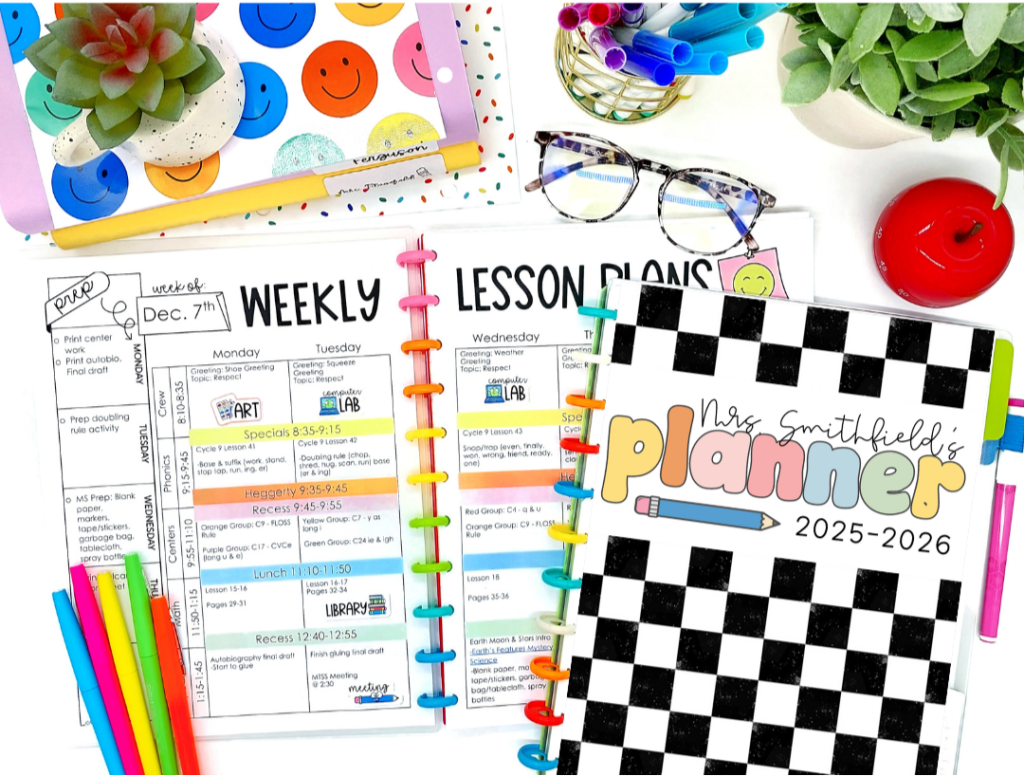
                I have created some templates to help with the batching process.  If you’d like some help to get started with batch lesson planning or just need help keeping your lesson plans nice and organized, try the lesson planning templates I created. The following items are included in the lesson planner:

                • weekly lesson planning templates
                • curriculum mapping templates
                • monthly checklist/goals etc.
                • month at a glance
                • year at a glance
                • upcoming important dates
                • batch lesson planning documents
                • class schedule
                • special class schedule
                • 300+ digital stickers
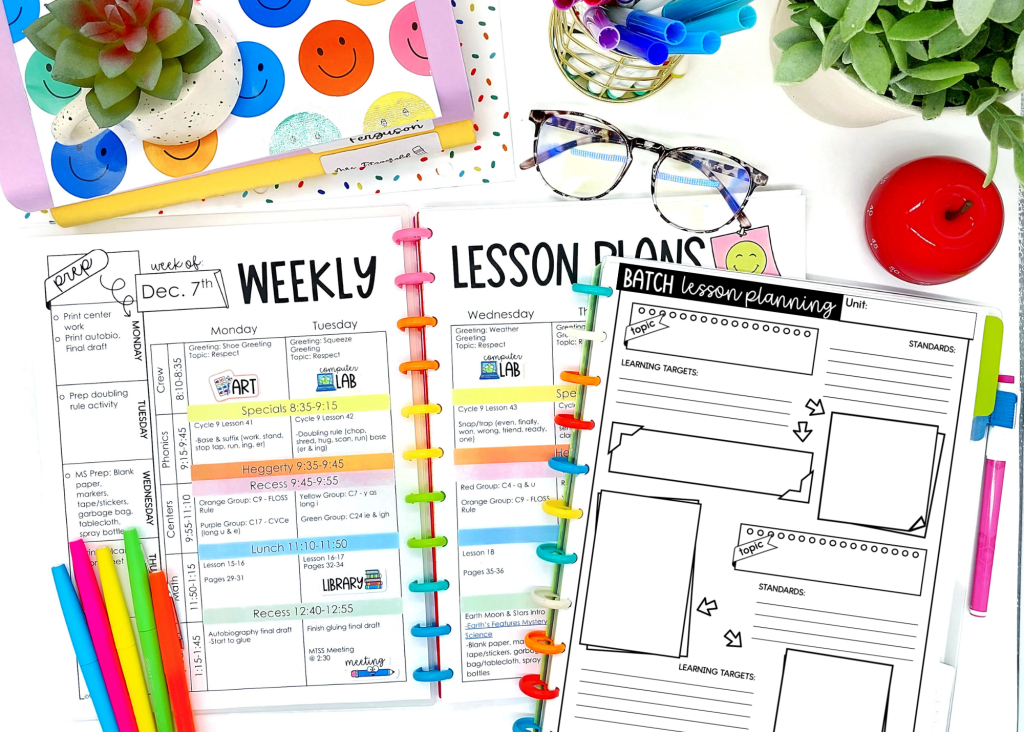
                A colorful planner opened to a weekly lesson plan for the week of December 7th, featuring sections for Monday through Wednesday, including subjects like art and library, along with additional blank lesson planning pages. Surrounding the planner are colorful pens, a succulent plant, glasses, and a red apple.

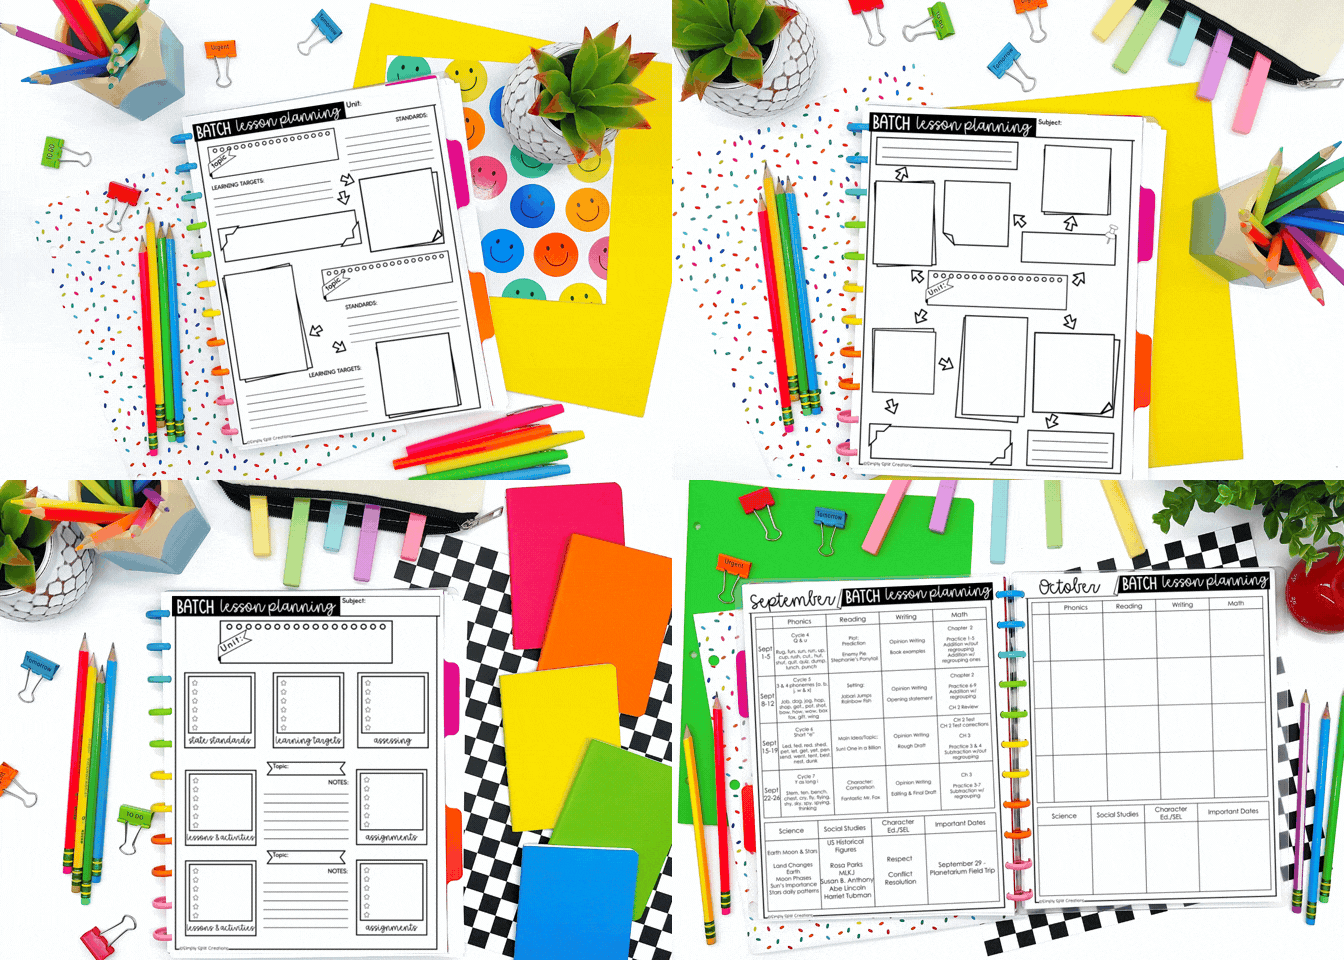
                Below is a close-up of the batch lesson planning templates included.  There are a variety of templates included to help make lesson planning a breeze!

                Colorful layout of a lesson planning sheet titled 'BATCH lesson planning Unit' surrounded by stationery items including colored pencils, paper clips, sticky notes, and a small potted plant.

                If you’d like a calendar, small group lesson planning, sub planning, and more, then you may be interested in the full planner bundle.  You can check out the planner bundle below:

                A colorful planner opened to January 2026, featuring monthly and weekly calendar sections, decorative stickers, notes section, and vibrant stationery items like highlighters and colored pencils.

                EL Skills Block, Literacy Centers, Phonics, Teacher TIps

                Mastering Classroom Reading Centers: Essential Tips for Teachers

                Somehow, each school year, I always forget how hard it can be to turn a classroom into a well-oiled machine.  

                One of the hardest areas I have found to get set up and fully functioning each year is reading centers.  The struggle might be real, but it doesn’t have to be.  

                Let me share some tips for teaching your students about your reading center process to make the transition period less painful.

                Tip #1

                My #1 tip is…

                Go slow to go fast.  Going slow in the beginning is so important so your students can really nail the routines, procedures, and structure of centers. 

                This might include…

                • Teaching, reteaching, & practicing the same center over and over again
                • Practicing transitions over and over again
                • Stopping centers abruptly to go over expectations again
                • Focusing solely on the procedure and less on actual learning (at least at first) – This is so important, because if it’s chaotic, there won’t be much learning or practicing going on at all anyway.
                • Addressing problems quickly when you see them happening in real time

                These suggestions might sound tedious, daunting, and disruptive, but I can promise you that if you focus on these things in the beginning, your classroom will run much more smoothly, which will allow learning to take place and exponential growth for your students.

                Tip #2

                Teach each center independently.  Your students should know exactly how each center works and have zero questions about them before combining that reading center with another center.

                Tip #3

                Slowly add in centers to a rotation. Do NOT start rotating all centers at once.  You need students to get used to rotating centers and completing centers independently while rotating with 2 centers at a time, then 3 centers at a time, and so forth until all centers are rotating at once.  The teacher center should be the last center introduced, so you can walk around and answer questions as needed.

                I typically follow a schedule like this:

                • Introduce center 1 and practice center 1 independently for 3 days.
                • Introduce center 2 and practice center 2 independently for 3 days.
                • Practice centers 1 and 2 on the same day (but go over expectations or procedure before/in between each center – therefore, no transitioning/switching centers independently) for 2 days
                • Introduce center 3 and practice center 3 independently for 3 days.
                • Practice centers 1 and 3 on the same day (but go over expectations or procedure before/in between each center – therefore, no transitioning/switching centers independently) for 2 days.
                • Introduce center 4 and practice center 4 independently for 3 days.
                • Practice centers 2, 3, and 4 on the same day (but go over expectations or procedure before/in between each center – therefore, no transitioning/switching centers independently) for 2 days.
                • Practice centers 1, 2, 3, and 4 on the same day (but go over expectations or procedure before/in between each center – therefore, no transitioning/switching centers independently) for 1 day.
                • Introduce center groups.  Introduce center rotation slideshow & timers. Practice rotating with your group to each center (literally just moving to the different areas, not completing any work.  Practice transitioning to two centers for each group (completing the work in each center) for 1 day.
                • Practice transitioning to two different centers for each group (completing the work in each center) for 1 day.
                • Practice full centers (including the teacher center).

                Tip #4

                Reteach expectations often.  Especially in the beginning, it is important to go over expectations for centers often.  Don’t be afraid to stop centers completely to reteach expectations altogether again.  This might seem annoying and redundant, but it’s important to have those expectations nailed down.  If your centers are sloppy to begin with, they will only get worse – I promise you – unless the problem is addressed and fixed.

                Tip #5

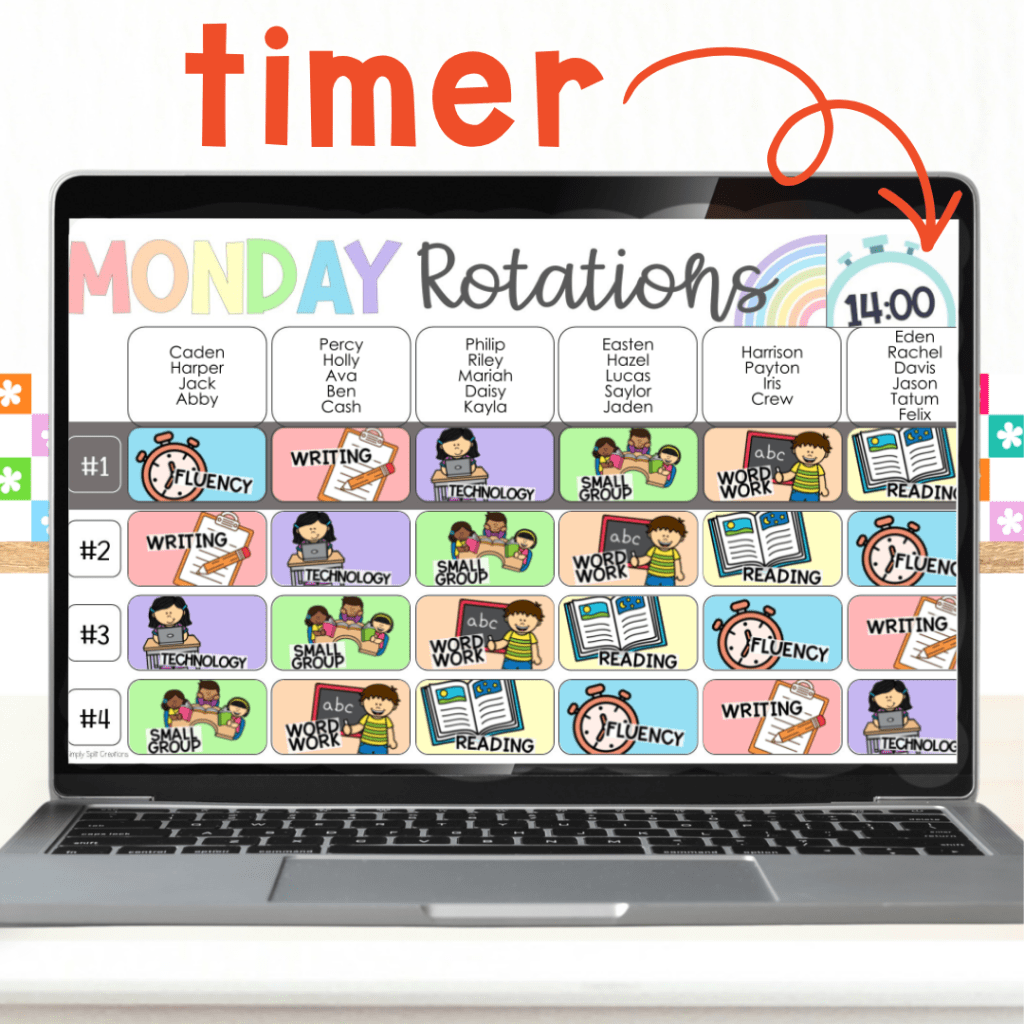
                Use a visible countdown timer.  Let’s face it, timers help people of all ages stay on task.  If students know what is expected of them to finish by the end of center time, having a visible timer showing students how much time is left in each center helps students hold themselves accountable during center time.

                I actually incorporate a timer in my center rotation slideshow (see picture below). 

                The center rotation slideshow also really helps students understand clearly which center they’re supposed to be at and where they will go next.  The slideshow definitely keeps my centers nice and organized.  I sell these center rotation slides in my shop, and they are linked below if you’re interested.

                Tip #6

                Plan for clean-up time in between centers.  Picture this, you’re a little 2nd grader heading to your next center, really excited to do the word work activity.  BUT, when you get to the word work center, you find papers scattered around the table, pencil shavings everywhere, and you’re not sure where all the dice went that are needed for the activity.  Would you be able to get to work very quickly?  Probably not.  First, you’ll need to find Jimmy and ask him where all the dice went.  Then, if you are lucky enough to find the dice and don’t get distracted talking to other students in Jimmy’s group, then you have to clean the work station, or hope that it doesn’t become a distraction. 

                Do you get the point?  The bottom line is that clean centers = less distractions which means more productive students

                STILL STRUGGLING?

                If your centers are still a hot mess after implementing these suggestions, you may want to take some time to analyze your center activities.  Ask yourself questions like…

                1. Are my centers easy enough for my students to complete independently, while still being challenging enough to help them progress and grow?
                2. Are my centers consistent each week?  Or am I constantly introducing new centers?
                3. Are there too many steps, moving parts, or tools needed to complete any of my centers?

                If it seems that your center activities are the problem, I will share my favorite full year reading centers resource that will not only help fix any of the above problems, but also be super EASY to prep each week because who has hours to prep centers each week.

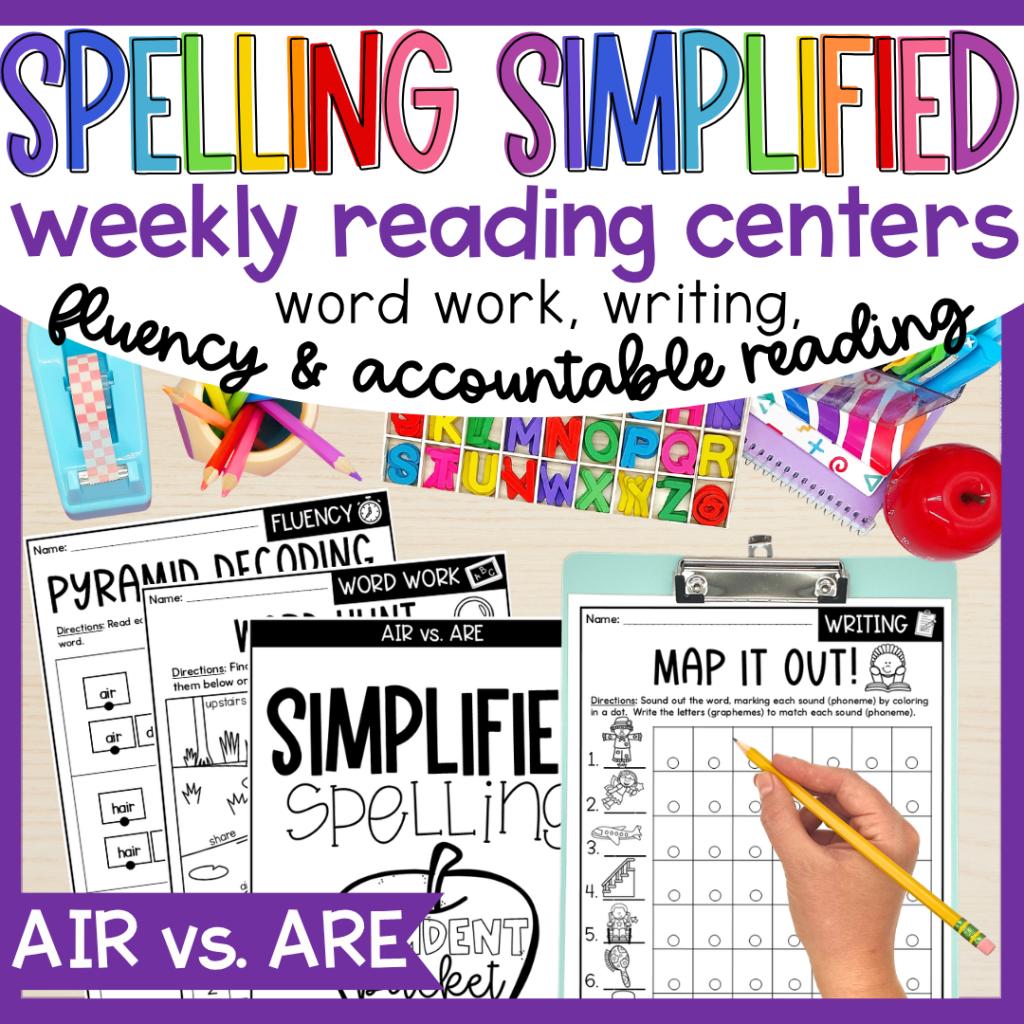
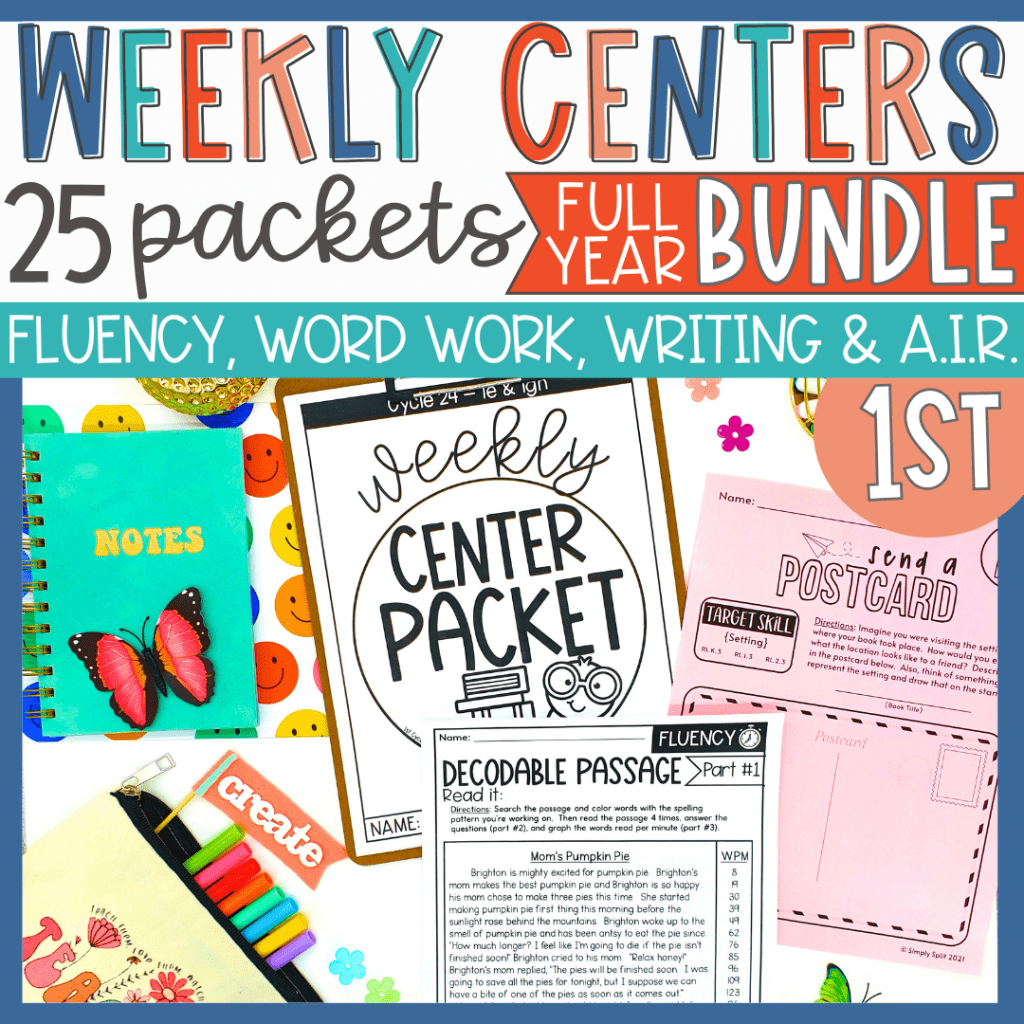
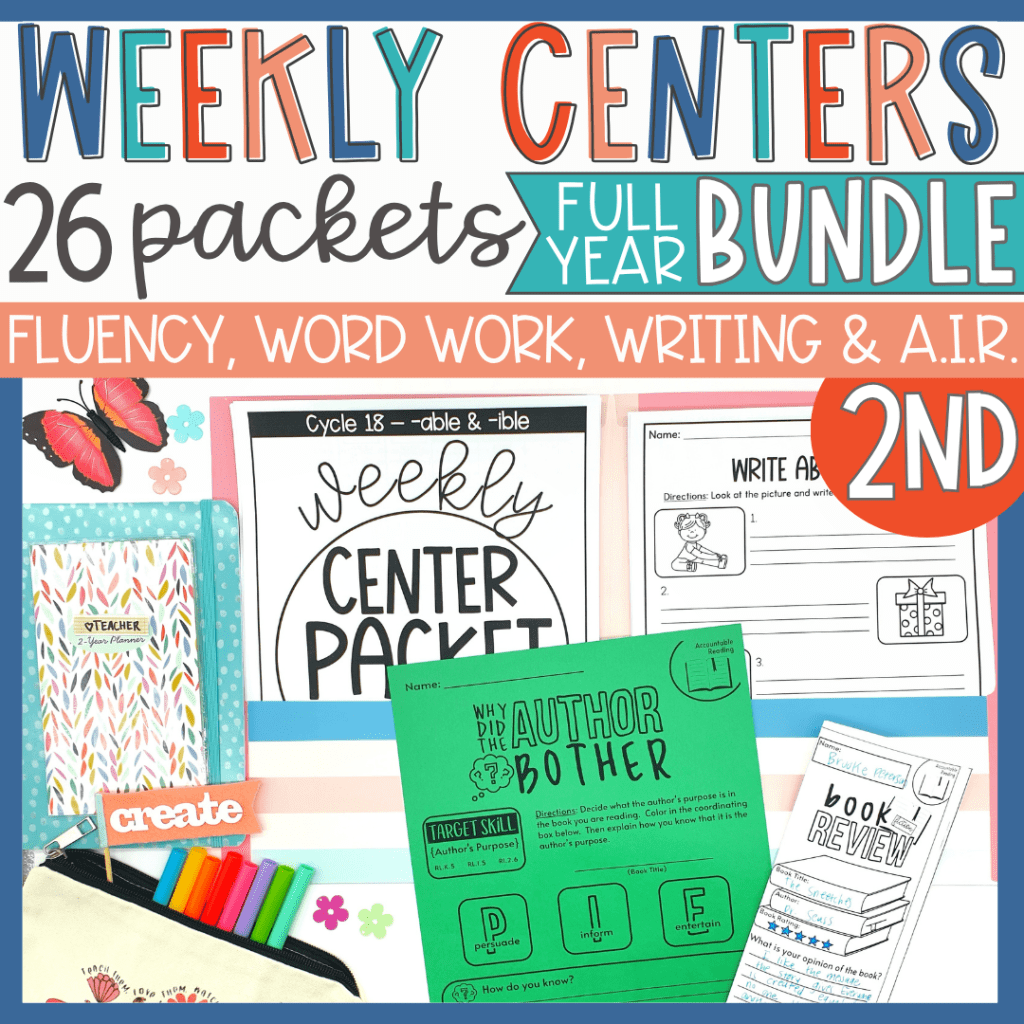
                These weekly reading center packets include several activities for each center (word work, writing, fluency, and accountable independent reading) totaling in 29 pages (per packet).  This gives you the ability to pick and choose the activities you’d like your students to complete.  

                My favorite part about these weekly center packets is that there is an accountability portion included.  The first pages include a checklist where students can mark off each page as they complete them.  With an accountability portion like this, it helps students stay on task and take ownership for the work they have completed (or not completed).

                I know many people might not be a fan of “worksheet” styled centers, but I will tell you why I will always choose this style of center over task cards, a game, or activity…

                • You can actually SEE the work students are doing which allows you to check their progress
                • Student can be held accountable (rather than, slack off or play games without the academic portion included)
                • The prep is actually manageable and takes WAY less time.  No laminating, no cutting, no little pieces.

                as a sidenote…

                • I was very intentional when making these worksheets.  They are not traditional, boring worksheets.  Instead, these worksheets were made with the child’s interest in mind, meant to engage and challenge students.
                • The activities are consistent week to week, so students are never guessing HOW to do an activity.  They already know what is expected of them.
                • I like to include fun learning games/activities at my teacher center, which gets students excited, and I can monitor their progress this way

                These weekly center packets are available for the full year for 1st & 2nd grade (look at the bundling options below):

                BUT, did you know that there is a template of these weekly packets that you can use to build your own center activities as well.  This means that if you have a different scope and sequence you follow, you can buy the centers that match, and then buy the template to create the remaining packets you need. This also means that you can purchase the template to build packets for a different grade level.  

                Check out the editable template below:

                EL Skills Block, Literacy Centers, Phonics, Teacher TIps

                How to Assess Students 1 on 1 Without Giving Up Your Prep Time

                Assessments are very important.  They provide teachers with valuable information about each student: what each student already understands and what they are struggling with.  Assessments don’t just help you understand what students do and don’t understand; they help teachers analyze student growth and can help teachers improve their teaching methods.

                However, especially in K-2 classrooms, assessments are not always easy.  As a teacher who has taught in Kindergarten, 1st, and 2nd grade, I know the struggle of assessing K-2 students (especially reading assessments) because they almost always have to be done one-on-one.  Where does a teacher find time to assess each student one-on-one?  What is the rest of the class doing while the teacher is assessing?  These are the hard problems that teachers often have to find solutions to, and it’s not easy.  Along the way, I found a few things that were helpful to me as I tried to make one-on-one assessments work in my classroom.  Keep on reading to learn of my secrets that can hopefully benefit you in your classroom.

                1. VOLUNTEERS: Ask for parent volunteers! – Many parents are eager to help in classrooms but just need to be asked.  Depending on what you feel comfortable with, you can either have parent volunteers do a portion of your assessment, OR you can have them read books aloud to the class while YOU assess students.  I personally usually like to do most if not all of the assessing myself because it helps me get a better picture of each student plus you’re able to make sure the assessment was performed with fidelity, but if you’re comfortable with parents assessing, this may be a great option for you.  I would recommend having parents sign a confidentiality agreement if they do help with assessments just to be on the safe side.  Otherwise, parents are perfect for reading books aloud for the class, while you assess.  I recommend assessing students in the hallway so that they aren’t distracted by the book being read aloud.
                2. ONLINE BOOKS: Use Vooks, Epic, or Story Online – all of these websites are amazing classroom tools.  These websites will read books aloud to the class.  Just project it to a screen and let it do its thing.  I’ve sometimes used these websites to play books in the morning time as students arrived at school and it is so helpful in keeping students engaged and quiet in the morning time.  These websites are also great when you need to do one-on-one assessments.  Let the books play while you assess students.  I would recommend using some noise-canceling headphones for your students to wear while they are assessed so they aren’t distracted by the book, or if you feel you are able, you can step into the hallway to assess students as well.
                3. CATCH-UP DAY/FREE FRIDAY: Another option is to have Free Friday. This works like a “Catch-up Day” where students are able to catch up on any work that they missed or haven’t fully completed yet.  Students completing all their assignments get to have “Free Friday.”  This is a great time to assess students.  Again, I recommend using noise-canceling headphones for the students being assessed to help them not get distracted while they are assessed. 
                4. ADDITIONAL COMPUTER TIME: Schedule additional computer time in the computer lab – This may not be an option for you or you may only have an opportunity for additional computer time at random times throughout the year, BUT if your school does allow this, it is so helpful to schedule extra computer time.  Have students work on something specific, use Epic, or whatever program subscriptions your school has, and assess students while the rest of the class is busy on the computers.  This is the easiest way to get assessments done very quickly.  Students are all usually quiet when on computers, and there is a lot less chaos going on, making it easy to assess students very quickly.
                5. LITERACY GAME DAY: Literacy game day is something that my students usually beg for.  All you need is some engaging phonics or reading games, and your students will be entertained while practicing reading skills.  My students typically behave really well during these times because they know if they don’t, we’ll end our game time early.  This makes it easy to assess students.  As long as students understand how to play each game, this is a really great option and can help you assess students quickly.  I would also recommend using noise-canceling earphones for students being assessed – that is, if they are getting distracted.  

                If you would like game recommendations, I will link some of my favorites below:

                • Snap it up! – This game is a really fun and easy game for students to learn.  This is available on Amazon – click here to view
                • Phonics Three in a Row – This is such a fun partner game.  It plays just like tic tac toe, except students must read the word in the box in order to place their “x” or “o” in the spot – click here to view
                • Speed & Read – I love this game option because it can be played with a group or individually.  Students roll the dice, move around the board, read the word, then find the clipart that matches the word they read, and then place a game chip over the clipart.  They work to get 4 in a row. – Click here to view
                • K-2 Phonics Games Mega Bundle – This includes all the phonics games listed in my shop.  If you want a wide variety of games, this is a much cheaper option than purchasing games separately – click here to view
                • Flashcard Games – I have a blog post you can view that talks about several fun games students can play with any flashcard set – click here to view
                1. CENTERS/WORK CHART – This works better for MOY or EOY testing because students will already be familiar with centers or a work chart in your classroom.  How this works is that instead of having a “teacher table,” you’ll just call individuals to be assessed.  This is typically when I assess students most frequently, but this is trickier to do at the BOY before students start centers.
                2. PREP TIME – Using your prep time is a last resort but sometimes necessary. Don’t sacrifice your whole prep time, but take 5 minutes of your prep time to assess 1-2 students while the class is at specials.  This will add up over time and before you know it, you can make it through your whole class of students.
                1. Write each student’s name on the assessment sheets you need completed.  This will help you keep track of which assessments still need to be completed (or use the tracker in my assessment pack).
                2. If you have a literacy team at your school, I would recommend asking for assistance with assessments at the beginning of the year.  Typically, the literacy team isn’t up and running until after assessments anyway, so this isn’t too unreasonable to ask and would save you a LOT of class time.

                Finding a good assessment that gives you a clear picture of each student’s strengths and weaknesses is so important.  It is also very helpful if you’re able to track students’ progress throughout the year to measure growth.  Grouping students for centers can also be tricky. 

                What if I told you there was an assessment that does all three of these things…because it’s true, there is!
                Check out the K-2 Assessment Bundle in my shop! Click here to view the assessment.


                Teacher TIps

                5 Tips for the End of the School Year

                The end of the school year can be a really stressful time.  Many teachers become beyond “burned out” and can barely hang on, which is why I wanted to share my top 5 favorite tips for the end of the school year.

                It’s important to make sure you find ways to save both your time and sanity.  My top tip is to have your students help you with the end of the year clean up.  After the testing is all done and the standards have been taught, rather than wasting time watching a movie, enlist your students to be helpers.  I promise your students will love helping out and it will be a great way for students to get their energy out (since we all know that summer fever is very real and makes it hard on teachers).  Most of these tasks, I would recommend doing on the last 1-2 day(s) of school.

                My students always love helping to complete these tasks and they get them done quickly.

                You can download and print this list by CLICKING HERE.

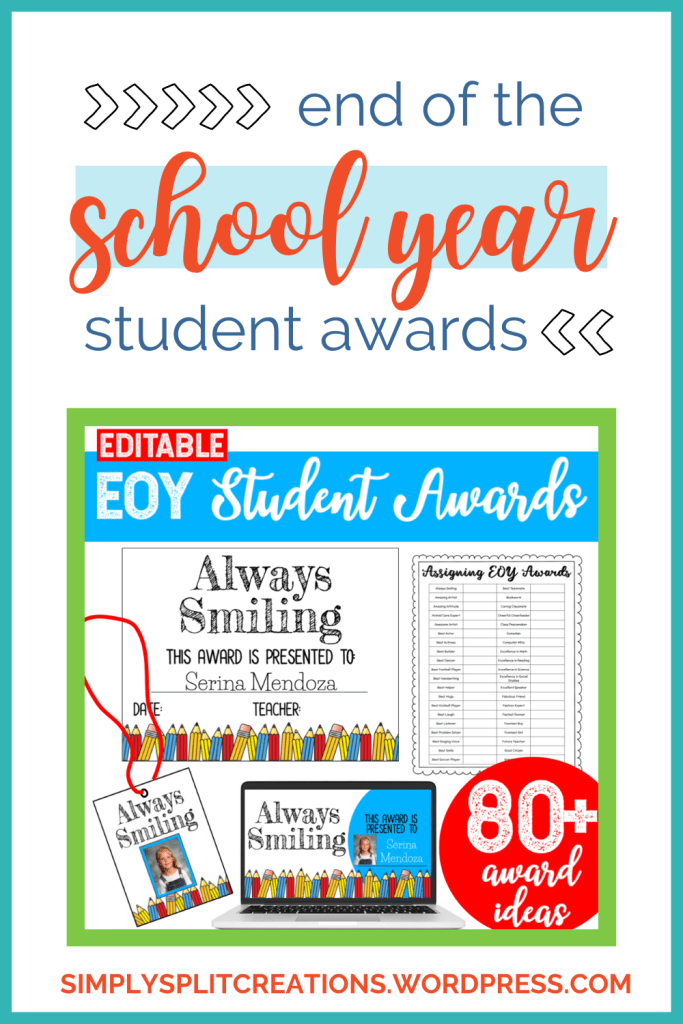
                I think it’s really important to help our students feel happy and appreciated at school.  Having positive interactions at school can impact a student’s whole life and can help them always enjoy learning.  For this reason, I try to make the end of the year special by giving each student an individualized award (all positive awards).  This has become a tradition in my classroom and my students always love award day.  You may like this idea but may feel a little bit overwhelmed trying to think of different awards for each student and preparing the materials for the “awards ceremony” but don’t fret, I’ve got you covered.

                I have created an awards ceremony pack which makes  it easy for you to have your own awards ceremony for your class  without feeling overwhelmed, especially if you’re already feeling burned out.

                Here’s what’s included in the awards ceremony pack.

                • Teacher Award List: There are 80+ award ideas included. Quickly assign an award to each student.
                • Student Certificate: This is a certificate to give to students during your award ceremony.
                • Awards Ceremony Presentation Slideshow: Make the ceremony special by using this great slideshow as you present the awards.
                • Student Medal: These are meant to be assembled with a ribbon attached to the top. Students can be awarded a medal along with their certificate during the ceremony.

                Look below to see what this award ceremony pack looks like or CLICK HERE to view the whole product description.

                Always print a few “paper mini yearbook” alternatives for students that may not have purchased a yearbook.  Students can either have a really great day and feel included or really bummed for not having their own yearbook.  Do everything you can to make all your students feel happy and included.  There are lots of great options for a printable paper mini yearbook on Teachers Pay Teachers.

                The end of the year can be such a crazy time.  My first year, I was mad at myself for forgetting to have my students sign my yearbook before releasing them for the schoolwide yearbook signing (don’t make the same mistake as me haha).  Because it can be such a crazy day, I highly recommend pre-typing a personalized yearbook message for all your students.  This can help your students feel special and will be a great memory for them for years to come.  I like to print my typed out message on sticker labels so they are easy to put in each student’s yearbook.  I have seen some teachers type a generic message and print on stickers, but I think it is so much more meaningful to have a personalized message. 

                I use Avery labels since they are super easy to make and print.  If you go to Avery’s website you can find the template for the size of labels you have and edit each label with a personalized message.  It doesn’t take very long and goes faster to type vs. writing out the message.  You can download the labels as a PDF when you’re finished and print them on your labels and you’re all set for yearbook signing.

                Many schools require student information to be passed on to the next teacher.  This may look differently for each school, but I think some of the most vital information (especially in k-2 classrooms) is how students are performing with reading.  This can help new teachers have a quick idea of how their class is when they start out and they can see if there were significant “summer slide” issues or not.  If there are, maybe they can do something to help with it next summer.  This may be stressful for teachers to deal with at the end of the year so I have a quick solution that I have started doing that has made this process super easy AND valuable for the next teacher to look at.  There’s nothing worse than being handed a bunch of tests and not knowing what they mean.

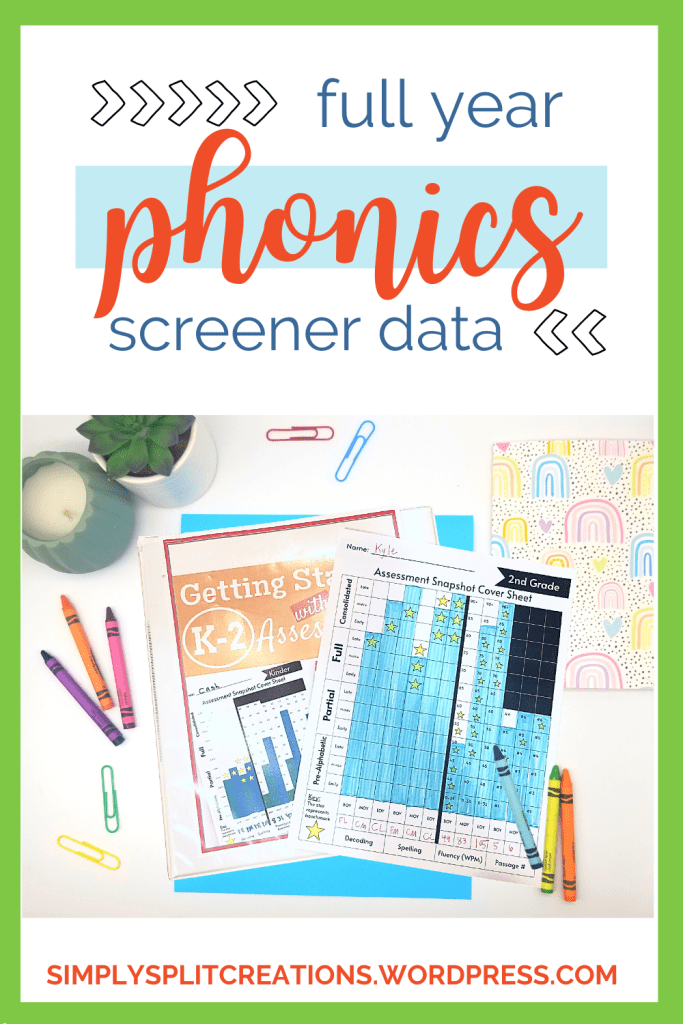
                I recommend using this one page (double sided) phonics screener summary.  It shows student growth throughout the whole school year and it is easy to tell at a glance if the student was “on grade level” during the previous school year.  This is not only valuable information to pass on to the teachers for the new year, but it’s also valuable information for you throughout the current school year.  I fill this same one page paper out throughout the whole school year for my students and it helps me analyze how each student is doing and then it’s super simple to just hand it over to the next teacher.  
                This is what the one page phonics screener looks like for 2nd grade (don’t worry this is a made up student and not their real data).  The stars mark what the benchmark is for that time of the year making it easy to see if a student is “on grade level” with just a glance.  CLICK HERE to view the product that this phonics screener is included in.

                When my students leave on that last day of school, my first instinct is to run out of the building as fast as I can and start my summer vacation. However, that’s not always the smartest thing to do for a couple reasons.  One, your admin probably wouldn’t be very happy with the status of your classroom.  Two, you are setting yourself up for a disaster to come back to next school season. I highly recommend thinking a little bit ahead so your “back to school self” will be happy and make a smooth transition back to school.  I recommend making sure your bulletin board materials are easily accessible.  I also recommend pulling out your papers for back to school night and even making copies of these materials.  The first year I did this, I was so relieved when August came and it helped me feel much more prepared for the coming school year.  I also like to make sure my labels are accessible so I am ready when I get my class list to label all the things.