Organization, Teacher TIps

How to Build Your Own Teacher Planner

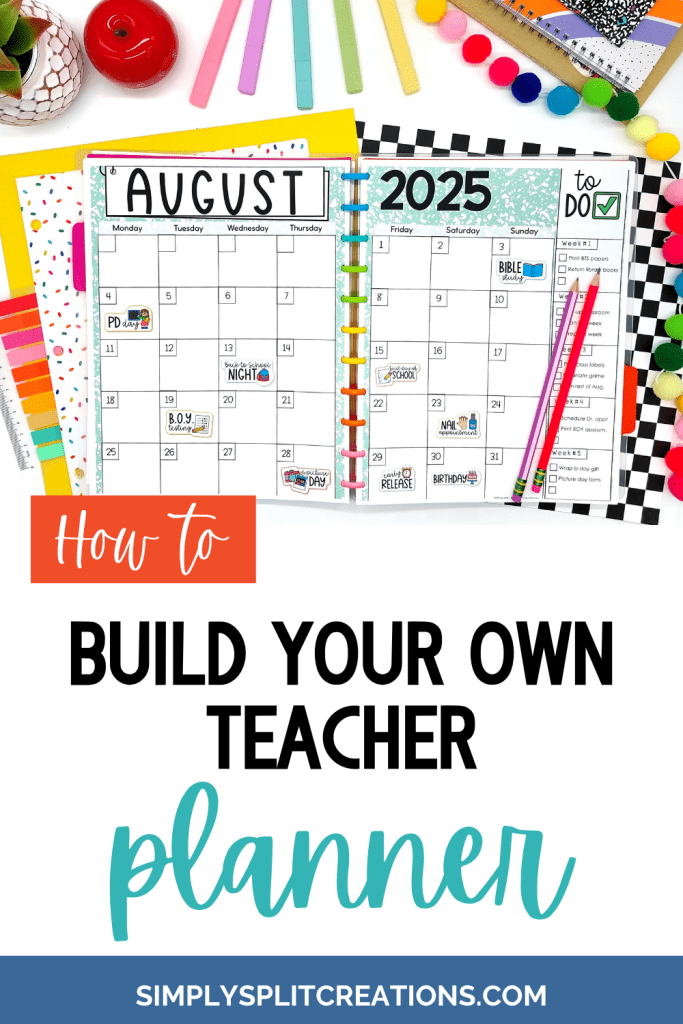
A colorful planner open to August 2025, displaying a monthly calendar layout with event stickers, beside decorative items like pens and a plant. The title reads 'How to Build Your Own Teacher Planner'.

Lesson planning can be such a chore, which is why it’s important to find a system that actually works for you.  Most teacher planners include pages I don’t need & lack the pages I do need, which is why my life changed when I finally found a way to build my own teacher planner with exactly the items I need.  This makes my lesson planner a lot smaller to lug around, more personalized, and easier to use.

Find a Printable Digital Planner

First, you need to find a printable digital planner that works for you.  There are lots of great options on TPT.  I recommend finding one that has all the components you’re looking for.  I created a big teacher planner that includes lots of great options.  You can purchase the full bundle or just grab the areas you want.  It includes…

  • LESSON PLANNER & SCHOOL YEAR CALENDAR (curriculum mapping, monthly checklists/goals etc, month at a glance, year at a glance, batch lesson planning, class schedule, important dates, specials class schedule, digital stickers, & more)
  • PLANNER COVERS, SECTIONS, & TABS ( 60+ customizable cover options, premade & editable section pages & tabs)
  • TEACHER ESSENTIALS (to-do lists, student checklists, class list, grading, party planning templates, class birthdays, volunteer sign-up sheets, parent communication forms, goal planning, PD tracking, notes, student seating chart template, passwords, & more) 
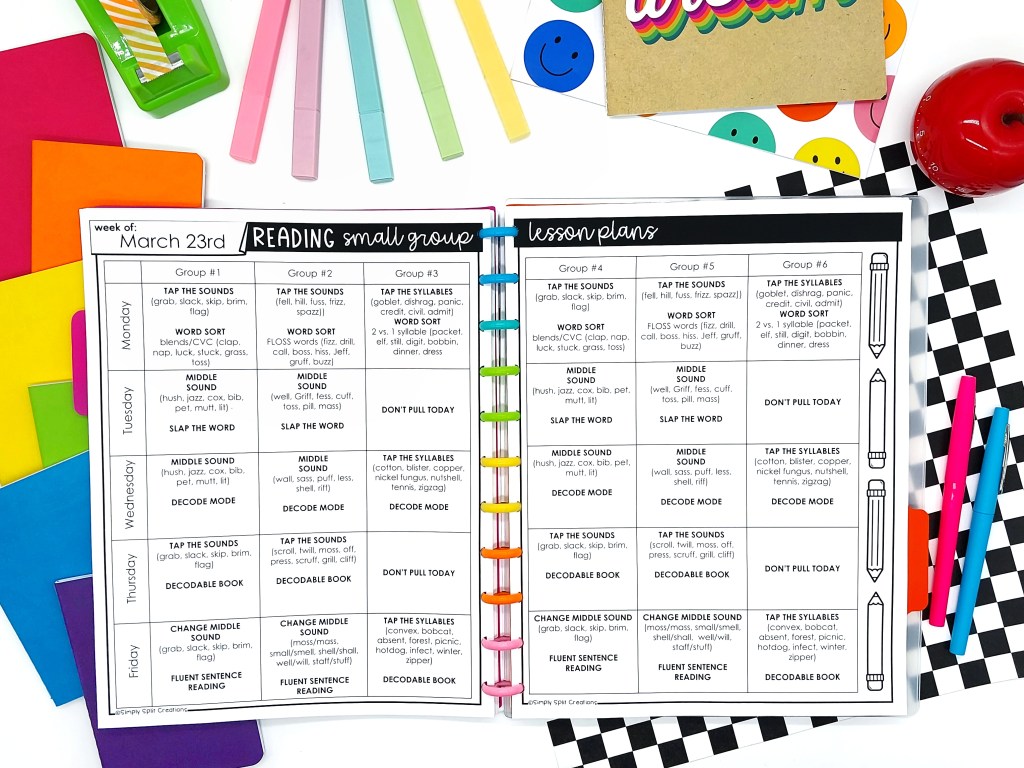
  • SMALL GROUP PLANNER (reading & math group formation, small group lessons, small group notes, etc.)
  • FIELD TRIP PLANNER (brainstorming ideas, field trip planning notes, transportation planning, field trip schedule, chaperone guide, emergency sheet, student list, student name tags, etc.)
  • SUBSTITUTE PLANNER (class schedule, specials class schedule, classroom management plan, sub plans, emergency protocols, emergency phone numbers, etc.)
  • PERSONAL PLANNER (weekly family schedule, grocery list, meal planning, gift planner, b-day list, book/movie/TV show recommendations, healthy habits tracker, nutrition & wellness, etc.)

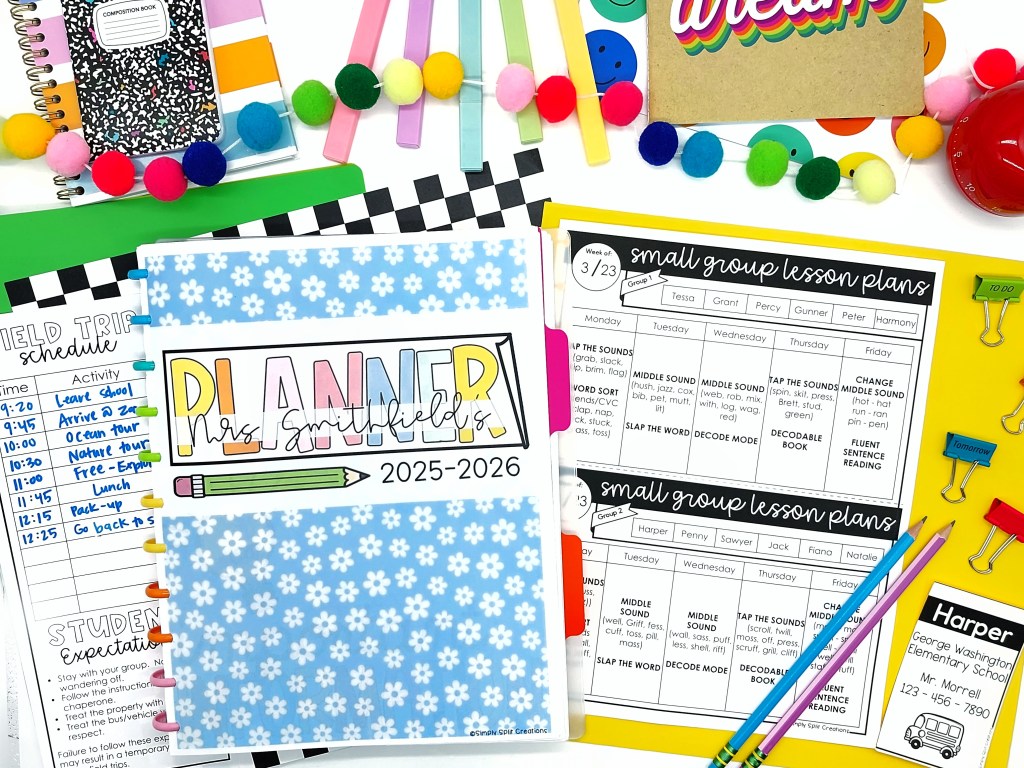
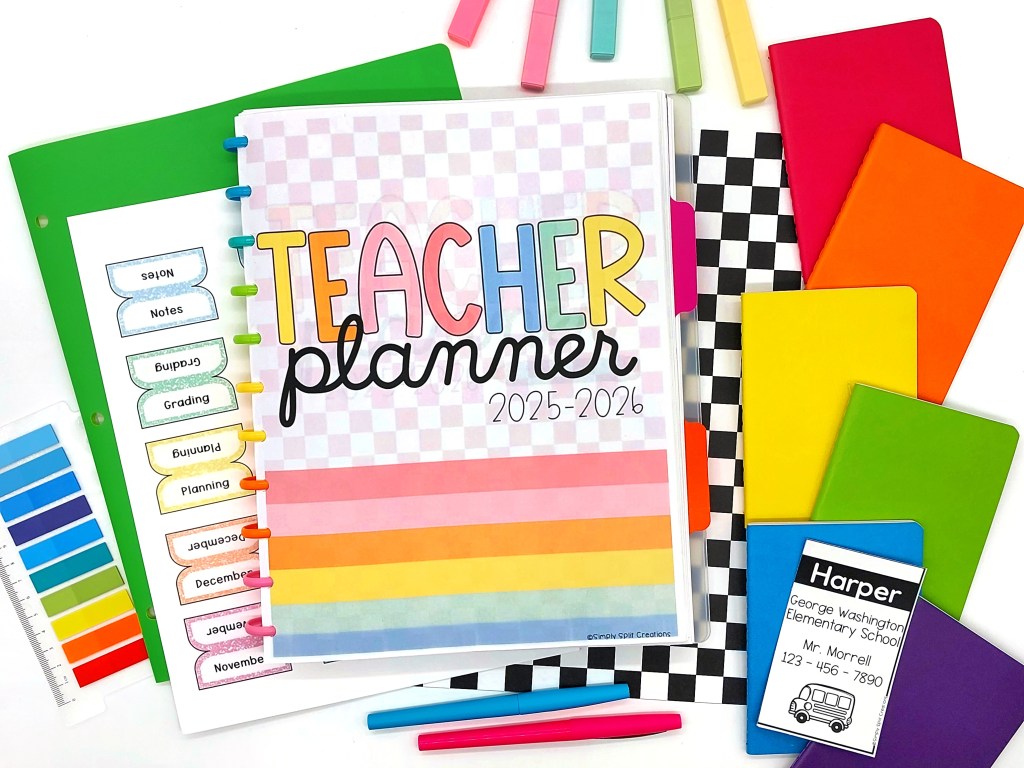
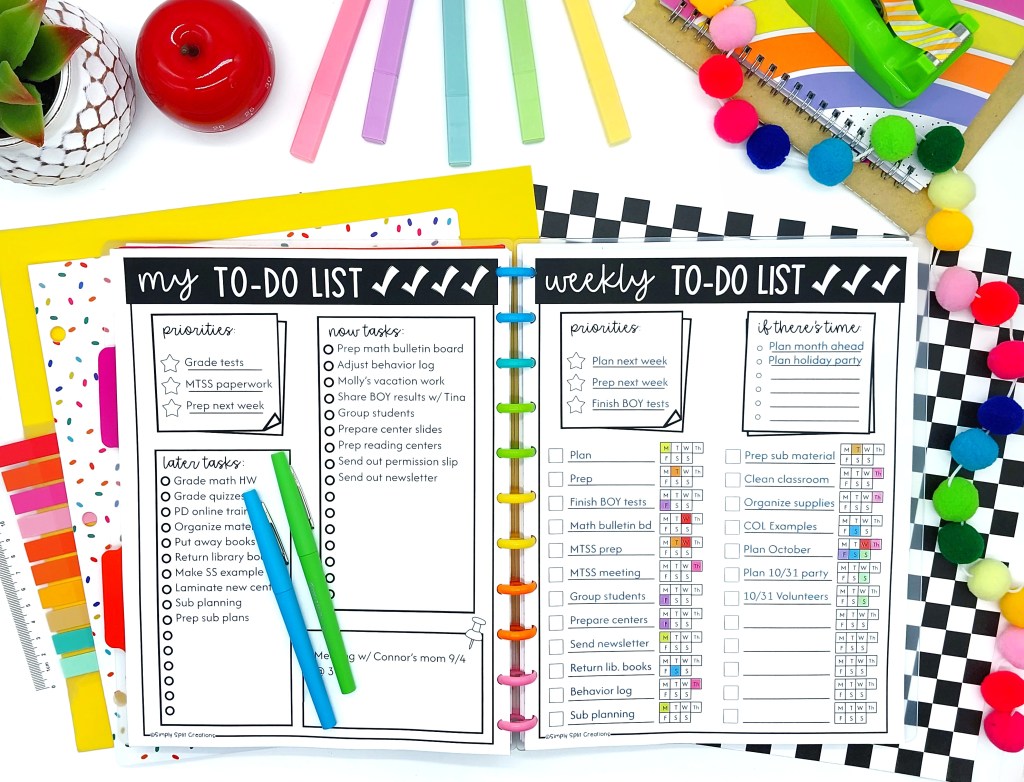
Below are some of my favorite pages from the planner:
How to Build Your Planner

You’ll need to decide what materials you want to use for your planner.  Below are some options (listed in my favorite order). 

  1. Disc Ring Binder:  This is my FAVORITE option!  You’ll need to purchase a few items to make this work, but it’s super durable, easy to add or get rid of pages, as condensed as you make it, plus it turns out really cute!  I’ll go into detail below about what items I use to build my disc ring teacher planner.  You can even re-use the materials year after year.
  2. Binder:  This option works well too and is easy to add or remove pages.  The downside is that it is super bulky.
  3. Spiral Bound:  This can be expensive and is a more permanent option.  It doesn’t make sense to figure out how to add pages, but you can remove pages if needed; it just might take some time to remove several pages.  This is very slim and easy to carry around, though, plus it looks really cute and professional.
  4. Folder:  A folder only really works for an extremely small planner.  If you just need a few items, this can work out really easily with a binder hole punch.  The downside is that it can be difficult to keep a particular page open.

Disc Ring Binder Supplies

  1. Digital/Printable Planner:  HERE’S A LINK to the digital/printable planner I made.
  2. 11 Disc Binder Hole Punch:  HERE’S A LINK to the hole punch I use. HERE’S A LINK to a more affordable option.
  3. Discs:  You’ll want to decide how many pages you think you will be printing so you know the size of disc rings you will need.  Below are the links to my favorite options for various sizes.
    1. 1in = 80-100 pgs (160-200 pgs if double-sided)
    2. 1.5in = 175-250 pgs (350-500 pgs if double-sided)
    3. 1.75in = 250-280 pgs (500-560 pgs if double-sided)
    4. 2in = 280-330 pgs (560-630 pgs if double-sided)

*Keep in mind that if you use cardstock paper or a heavyweight paper, you may not be able to fit as much paper in your planner.

Extra Supplies that are Helpful

  • Disc Transparent Covers:  You can simply laminate your cover page, but if you want your planner to be more durable, I would recommend using a 10 mil laminating pouch, OR, getting the transparent disc covers.  HERE’S A LINK to the ones I use.  
  • Disc Paper Pockets:  If you like storing other papers in your planner, it can be really nice to have a pocket in your planner.  HERE’S A LINK to the pockets I use in my teacher planner.
  • Month Sticker Tabs:  If your planner doesn’t come with printable tabs, or you just don’t want to print and cut your own tabs, I would recommend using these month sticker tabs.  HERE’S A LINK to the month sticker tabs I have used.
  • Pen Holder Adhesive:  I love keeping a pen or pencil with my planner, so this pen holder adhesive is a must in my opinion.  You can grab a pack and use them year after year, or you can reuse the same transparent cover & pen holder on your planner each year.  HERE’S A LINK to the pen holders I use.

Printing Tips

  • Print the calendar on cardstock:  I like having a heavier feel to my calendar pages.  I use cardstock for the calendar pages as well as my cover page.
    • If you want to add pages in between the cardstock calendar pages, DO NOT PRINT THEM FRONT & BACK.  Instead, you can add pages in between the calendar months manually after printing.  You can tape the calendar pages together to the next page so that the pages flow more nicely if the blank pages bother you.
  • Duplicate one document to build your printing file:  You’ll want to duplicate or make a copy of the planner, then copy & paste the pages in the order that you want them to appear in your planner.  This helps you be able to print front & back.  If there are pages that specifically need to print on the left page or right page, you’ll want to pay attention to that when printing so that they line up nicely.  You can add a blank page if needed to fill in as a placeholder.  You can assign ODD numbers to appear on the LEFT SIDE and EVEN numbers to appear on the RIGHT SIDE or vice versa.
  • Test Print:  I recommend test printing a couple of pages to make sure they are lining up the way you want them to in your planner. 
  • Think before you punch holes:  It can be super easy to punch holes on the wrong side of your pages.  I recommend lining the pages up and test “opening” the pages before actually hole punching them.  This way, you can make sure you are happy with how the pages will lay in your planner.

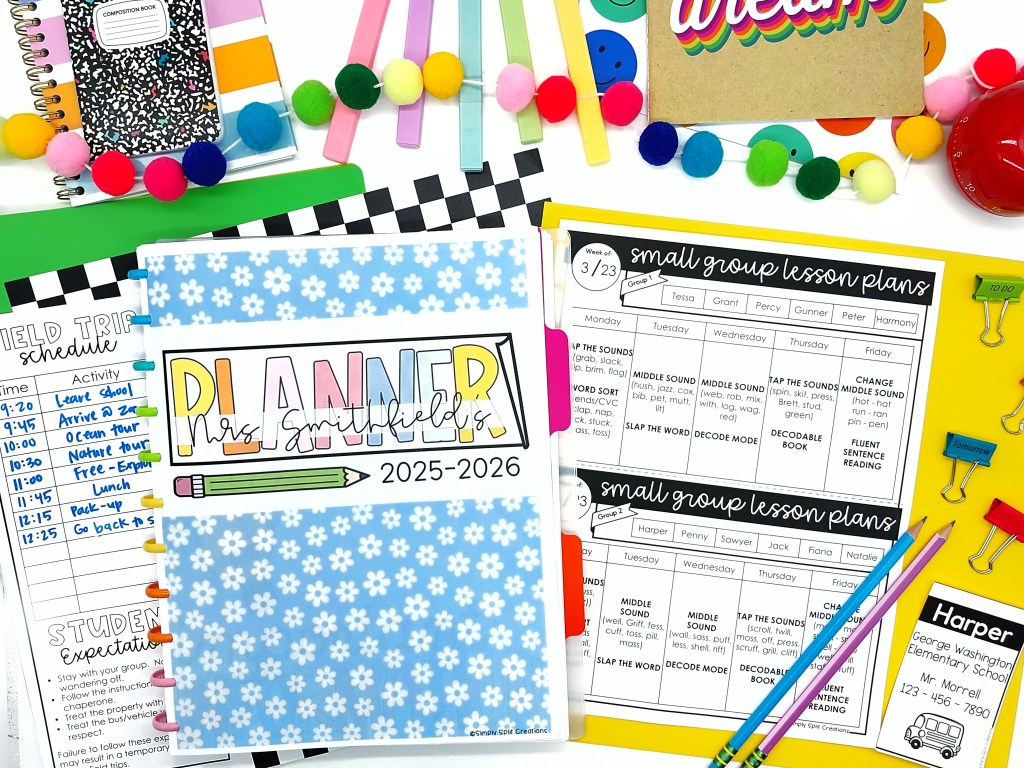
Below are a few pictures of the final product.

Teacher TIps

The Ultimate Lesson Planning Batching Method to Save You Time

An organized workspace featuring a lesson planning notebook, colored pens, and pastel notepads on a pink background. The image promotes an effective lesson planning method.

Planning… Love it or hate it, it’s a huge part of teaching.  

If you haven’t been able to find a good planning routine, or if you’re struggling to make sure things are planned week to week (or even day to day), I’ve got a suggestion for you that completely changed the way I lesson plan, and helped me get time back.

Early in my teaching career, I STRUGGLED with planning and prepping.  During my first year of teaching, those first couple of weeks of school were LONG and HARD.  I was planning day by day and staying in my classroom until after dark to finish planning/prepping what I needed for the next day.  That is an absolutely exhausting way to live.  Slowly, I got faster and better at planning.  

When I started implementing “batch” lesson planning strategies a few years ago, I remember feeling like I had happened upon magic fairy dust.  Planning all of a sudden became SOO much easier, and I finally had a good rhythm and no longer felt like I was drowning.  

If batch lesson planning is new to you, don’t worry, I’ll go over the basics with you so you too can gain your time back and lesson plan in a breeze.

What is batching?

If batching is brand new to you, you may be wondering what batching is.  Batching is basically doing “like tasks” in bulk.  Batching saves time because there are few transitions and your mind can focus on one simple thing, which often makes things flow more easily.

How does batching apply to lesson planning?

When it comes to lesson planning, I like to batch lesson plan by subject.  Batching by subject is helpful because you can stick with one subject and plan out a month’s worth of lessons in a pretty quick amount of time.  This is because you’re not switching between different concepts, and you’re solely focused on one subject.  Planning this way also has helped me think more long-term and be more strategic or “thought-out” when lesson planning.

Lesson plan batching in action?

So you might be wondering how this actually works, so I’ll give you an example.

When you start out, you will have to do a bit more planning upfront, but it will go quicker after the first week.

During the first week, I plan the following items:

  • Teaching procedures
  • Get to know you activities
  • Grammar – throughout the next 4 weeks
  • Math – throughout the next 4 weeks
  • Phonics
  • Writing

During the second week, I plan the following items

  • Grammar – (already planned)
  • Math (already planned)
  • Phonics – throughout the next 4 weeks
  • Writing 
  • Social studies/science 

During the third week, I plan the following items

  • Grammar (already planned)
  • Math (already planned)
  • Phonics (already planned)
  • Writing – throughout the next 4 weeks
  • Social studies/science  

During the fourth week, I plan the following items

  • Grammar (already planned)
  • Math (already planned)
  • Phonics (already planned)
  • Writing (already planned)
  • Social studies/science – throughout the next 4 weeks

Once you get to this point, you only have to prep 1 (maybe 2) subjects a week.  This significantly reduces the amount of time I spend lesson planning, which leaves me time to grade, prep, or any of the other million things on my to-do list.

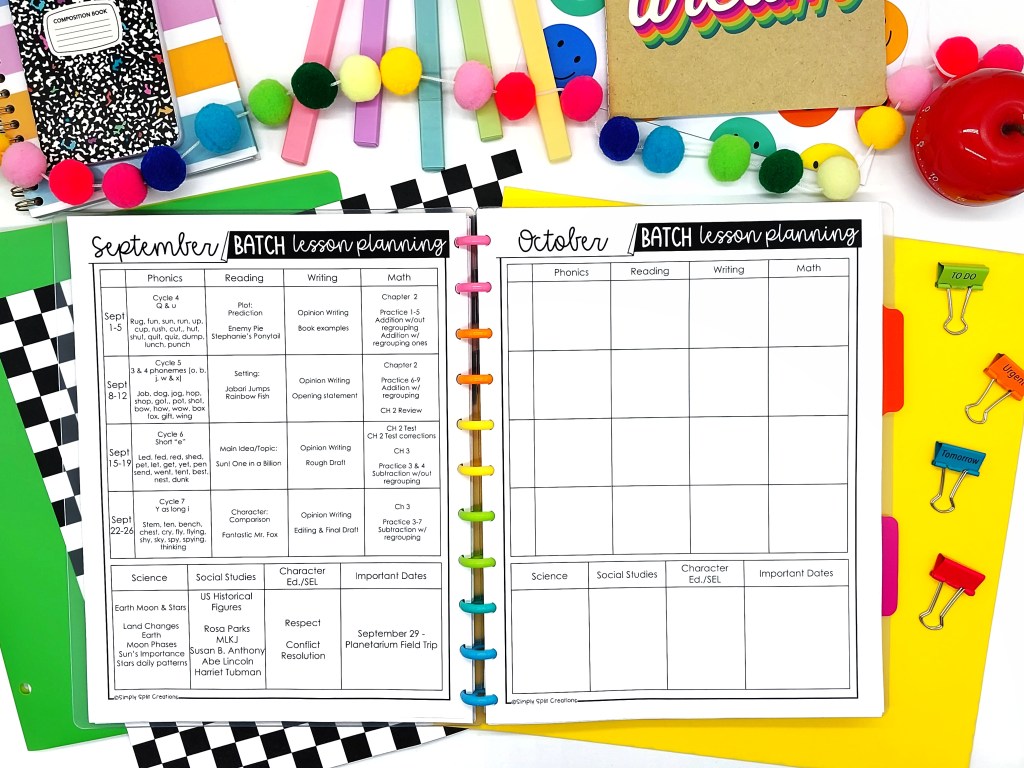
I have created some templates to help with the batching process.  If you’d like some help to get started with batch lesson planning or just need help keeping your lesson plans nice and organized, try the lesson planning templates I created. The following items are included in the lesson planner:

  • weekly lesson planning templates
  • curriculum mapping templates
  • monthly checklist/goals etc.
  • month at a glance
  • year at a glance
  • upcoming important dates
  • batch lesson planning documents
  • class schedule
  • special class schedule
  • 300+ digital stickers
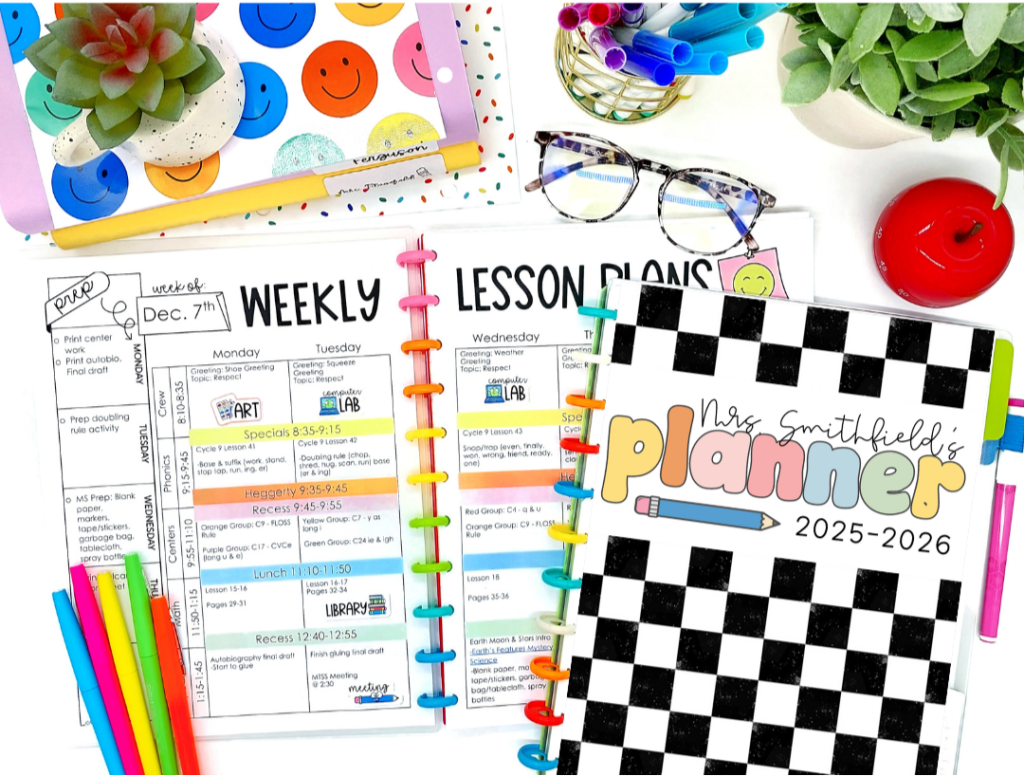
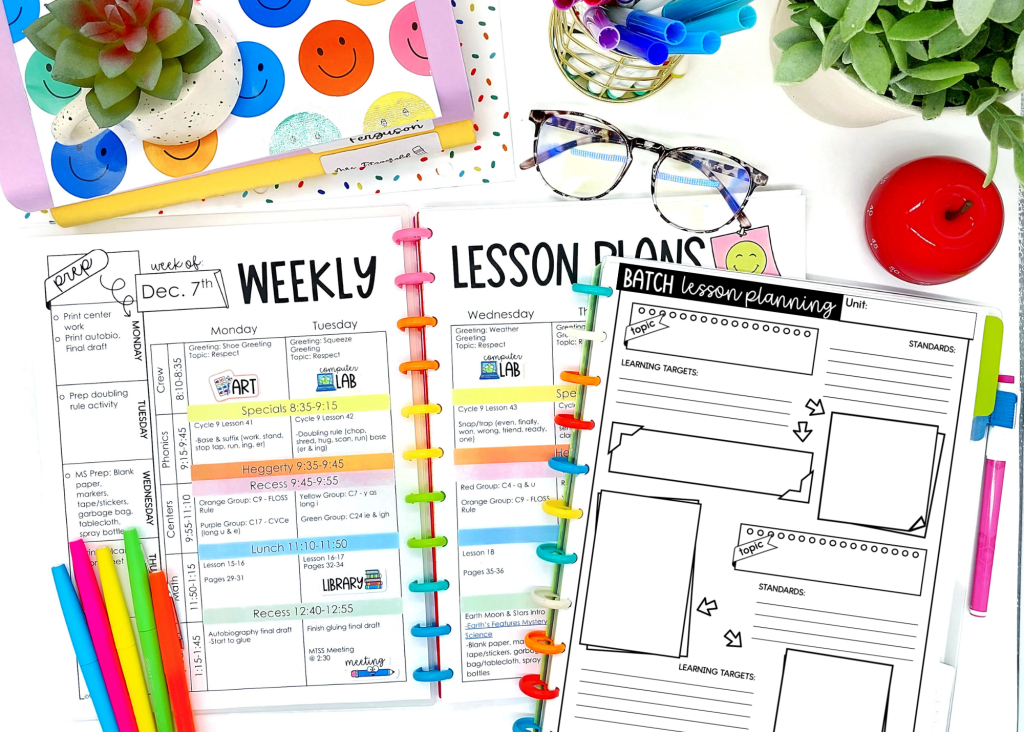
A colorful planner opened to a weekly lesson plan for the week of December 7th, featuring sections for Monday through Wednesday, including subjects like art and library, along with additional blank lesson planning pages. Surrounding the planner are colorful pens, a succulent plant, glasses, and a red apple.

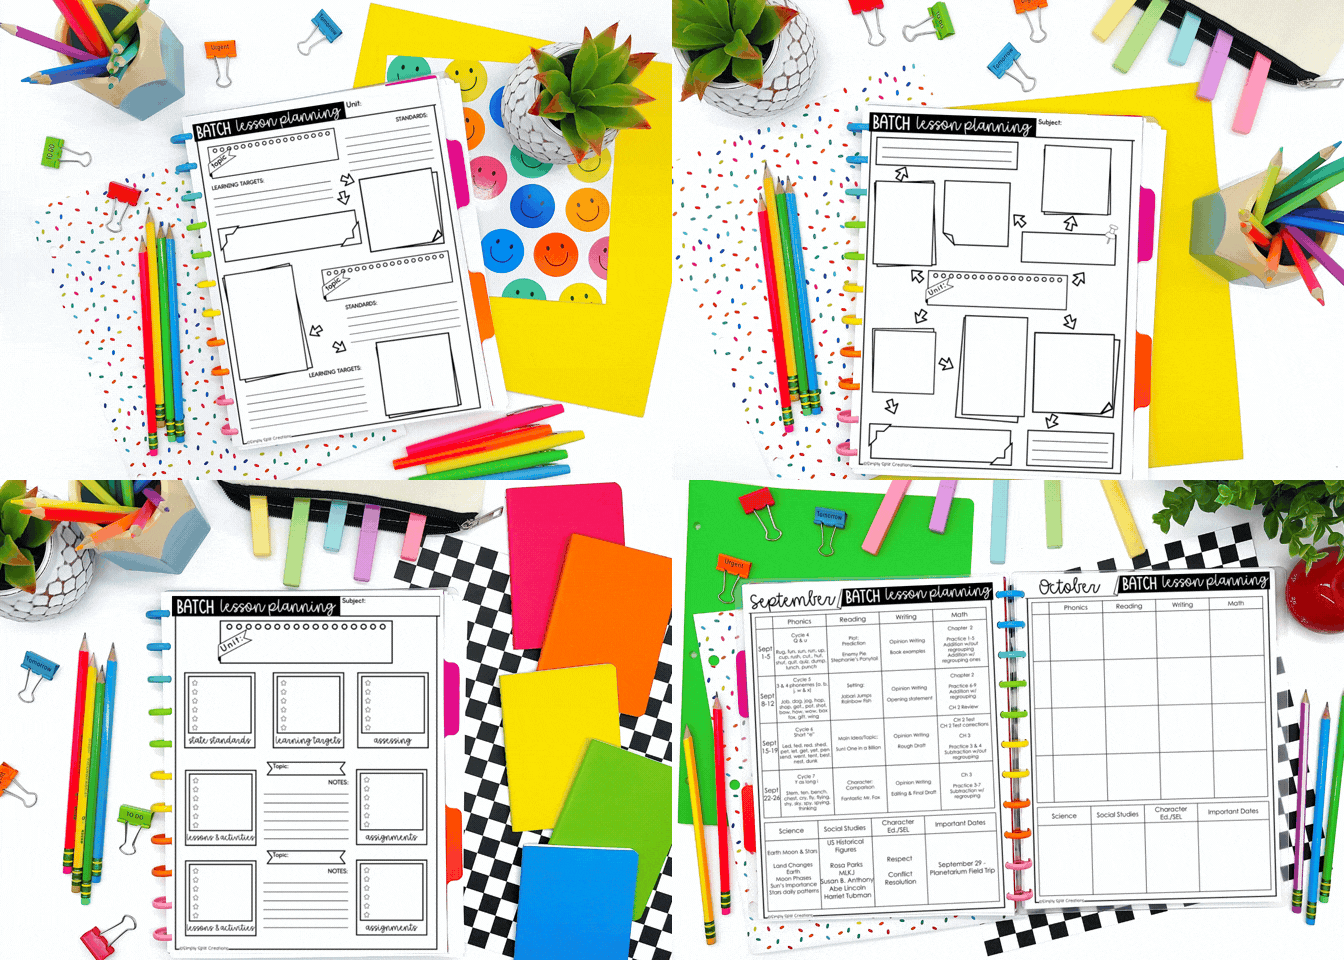
Below is a close-up of the batch lesson planning templates included.  There are a variety of templates included to help make lesson planning a breeze!

Colorful layout of a lesson planning sheet titled 'BATCH lesson planning Unit' surrounded by stationery items including colored pencils, paper clips, sticky notes, and a small potted plant.

If you’d like a calendar, small group lesson planning, sub planning, and more, then you may be interested in the full planner bundle.  You can check out the planner bundle below:

A colorful planner opened to January 2026, featuring monthly and weekly calendar sections, decorative stickers, notes section, and vibrant stationery items like highlighters and colored pencils.

Organization

How to Plan and Prep Effective Small Group Lessons in 5 Minutes or Less

If you feel like you never have time to complete all of your teacher tasks, you are not alone.  This is a common feeling amongst teachers and because of this, teachers often get burned out very quickly.  In order to avoid feeling burned out and still get all the important things done, it’s important to figure out how to streamline your processes to make better use of your time.  In order to save my sanity, I figured out a great way to help save me time when it comes to planning my small group lessons that has worked really well for me.  I’m going to share some of my favorite secrets to help you get more accomplished and hopefully feel less burned out.

Keep in mind that in order to make this a streamlined process, it will take some initial prep.  This initial prep will end up saving you SO much time in the long run though.  Once you have things organized, you will thank yourself in the future when you are able to successfully prep your small group lessons in 5 minutes or less.

Also note that it is possible to completely bypass a good majority of the prep work and skip steps 1-4.  If you’re looking for less upfront prep work, skip to the end of step 4 and read the section labeled “Want something even more streamlined and with less up-front prep work?”

First, you will want to figure out what phonics scope and sequence you are going to follow within your small group lessons. If you have a phonics program that your school has adopted, use the scope and sequence provided and follow the order that each phonics rule is taught.

If you don’t have an adopted program, I would suggest choosing a program that is research based and follows the science of reading (SOR).  

I highly recommend following the EL Skills Block curriculum.  You can access all their manuals online for FREE and it is research based. This is a K-2 program.  I have made several activities that align with this program which you can use to supplement any lessons or use in centers.

Another great scope and sequence to follow is the one that LETRS includes in their manuals.  Their scope and sequence is laid out very nicely and specifies when each phonics skill should be mastered for reading and for spelling (they are at different times). Their scope and sequence is planned for K-3 students.

Next, you’ll want to create word lists that follow each of the phonics skills in your scope and sequence.  This may seem silly, but it can be hard to think of words right on the spot and you’ll want to have this already figured out to streamline this process.

If you are using the EL Skills Block curriculum, I have pre-made spelling word lists that align with their scope and sequence.  You can grab a copy for the grade level you teach from my TpT shop.  However, I highly recommend getting the K-2 bundle, the reason being that you will have students that are above or below grade level and you will want to be able to accommodate them and have materials and resources already prepped.

I keep a stapled copy of all the word lists at my small group table that I can quickly reference when needed during small group lessons.

You may already have some great phonics activities up your sleeve which is great.  You can skip this step if you feel strong in this area already.

Some of my favorite low prep activities to do during small group lessons are:

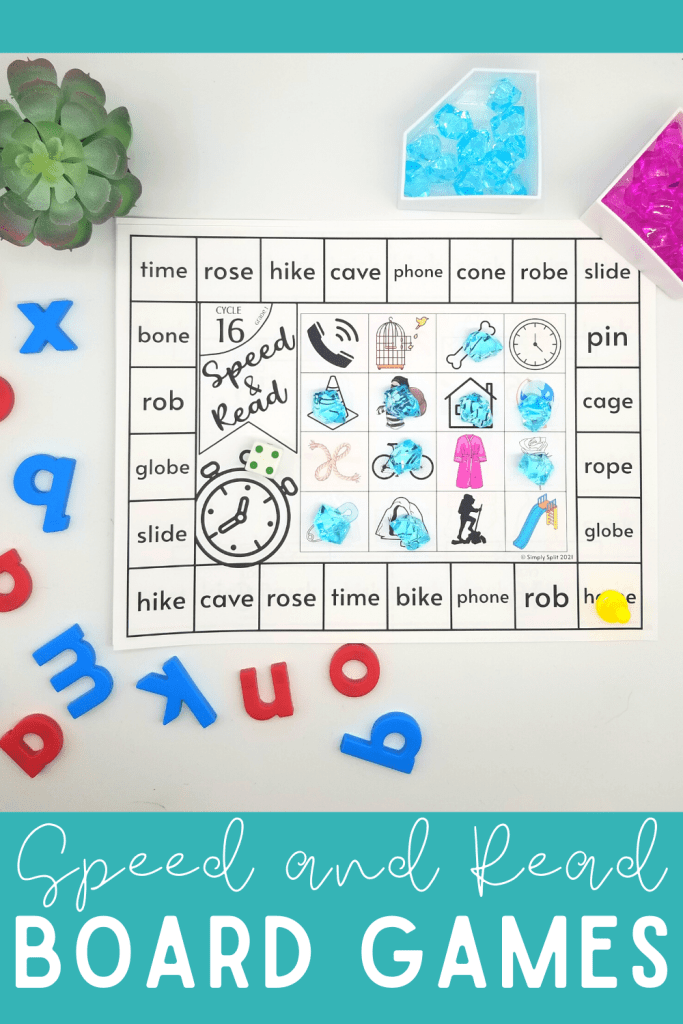
There are some additional small group activity ideas you can check out here.  This is a FREEBIE from my teachers pay teachers shop.  There are so many great ideas to use as a small group lesson.  Most lessons can be adapted by just using a whiteboard which I LOVE because there is no prep needed.

It may be helpful to record the phonics activities you have already and figure out what phonics skills you may be lacking in your resource collection. This can also be used as your lesson guideline that you can use down the line. Feel free to use this FREE template I created to help you organize and analyze what you have and need to still get.

After you have been able to analyze all the materials you have and what you might need, you’re going to want to get all those materials fully prepped.  You can enlist help from others so this can be a smooth quick process.  Here are a few suggestions:

  1. Contact the education department of a local college.  Some colleges may require students with an education major to complete a related service project.  Some students may just want to get involved with working with a teacher to gain experience.  You can use this to your advantage and ask for volunteers to help prep materials for your classroom.
  2. Ask teachers at your school if they have any students that may have spare time to help.  Some teachers may be wanting to do a class service project or may have students that finish with their work early that can volunteer and help in your classroom.  It never hurts to ask and see if you can get any help.
  3. Ask for parent volunteers.  Parents often want to get involved in the classroom but aren’t always available during school hours to help.  I usually get a lot more parent volunteers to help prep materials on their own time rather than volunteers to help in the classroom.  It is a great solution and can help save you so much time.  One of my favorite ways to get parent volunteers is by using the ClassTag app.  I use ClassTag as a way to communicate to all parents and it has a great method for asking for volunteers.  When you ask for volunteers on the app, parents can see if the volunteer spot has been filled or not.  ClassTag will automatically send out the volunteer opportunity again after a while if it has not been filled to make sure the volunteer opportunity isn’t lost.  Since using this app, I was ALWAYS able to get a volunteer opportunity filled. 

You may be facing a lot of challenges or feel stuck if you are just starting out with teaching small group lessons or are teaching a new grade level, or maybe small group lesson planning is just not your thing and you are trying to improve. You may just not have time to do the upfront prep work.  Whatever problem you may be having, I can help you out.  I have made small group lesson plans for the whole year that you can use.  They follow the EL Skills Block Phonics Curriculum which is research based.  All you need to do is print it out and get familiar with the different activities used throughout the booklet and your small groups are set!  There are learning targets, word lists, and great research based activities to teach each phonics skill.  You can adapt most activities to work with just a whiteboard.  There are 1st grade and 2nd grade options to purchase.  If you have students on various levels, you may want to grab both 1st and 2nd grade levels.  This will help save you quite a bit of time and make it possible to skip over steps 1-4. Click below to see more details about these resources.

Before starting centers, you need to assess students, this is so you know how to group students AND what skill each group needs to work on.  If you don’t know where to start when it comes to assessing and grouping students, I have another blog post all about this.  You can check out this blog post by clicking here.


I personally really like to use the assessment that EL Skills Block provides with their curriculum.  It systematically helps group students after they are assessed AND it tells you exactly what skill that each group should focus on next.  It aligns with the other helpful resources talked about in this post.  You can check out my version of this assessment by clicking here.

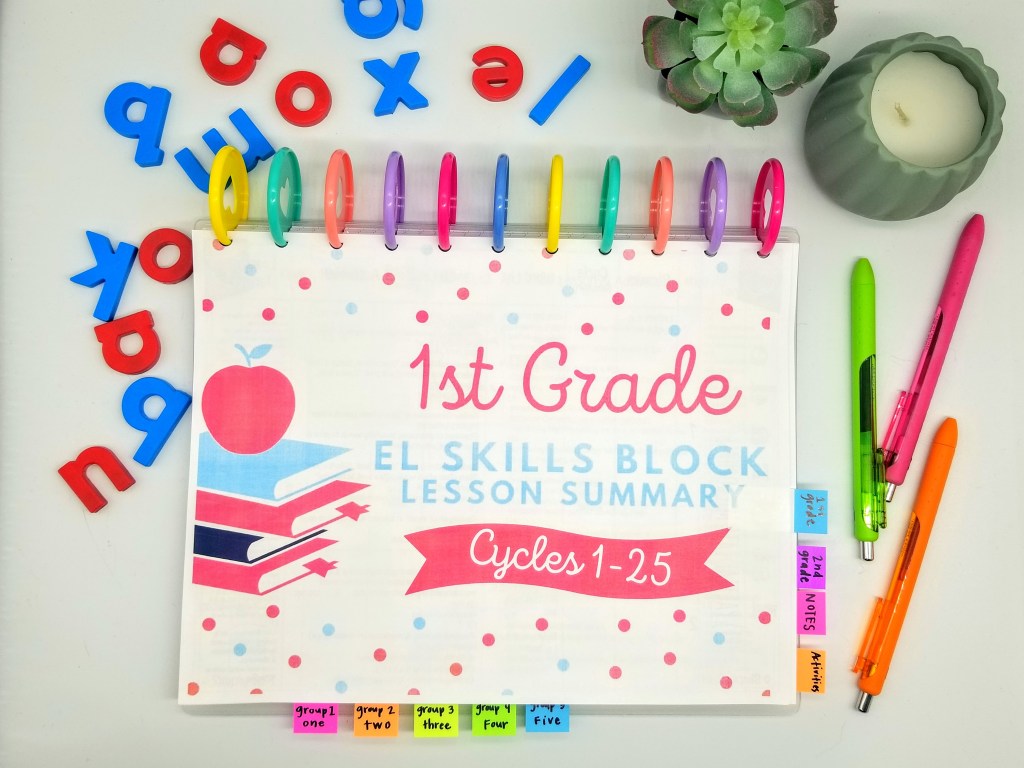
After you have been able to assess all your students, put them into groups, then comes the easy part.  All you need to do is find the matching skill each group is working on.  You should be able to easily find this if you filled out the FREE TEMPLATE or if you purchased the small group lesson activities.  I like to place a tab for each group next to the lesson they are on.  It looks  something like this:

Now my weekly prep is literally moving each group tab marker up to the next phonics skill and pulling any pre-made materials if needed for the included activities.  It really is that easy.  

Where it does take initial prep which may be daunting, I promise you that in the future, you will thank yourself for making things streamlined. You can then use these materials year after year and will save so much time!